When you insert a USB memory into a Windows 11 computer, it is convenient for the folder to appear automatically. However, some people may find it annoying to auto-display folders. What should I do in such a case? So this time I’m going to show you how to prevent the folder from automatically appearing when you insert a USB stick into a Windows 11 computer.
I want to stop automatically showing a folder when I insert a USB memory!
When you upgrade from Windows 10 to Windows 11, when you insert a USB memory into your computer, folders will automatically appear by default.
This is convenient, but some people find it annoying that the folder automatically pops up every time. Also, if you turn on autostart, you may get infected if a virus is contained in the USB memory.
In this case, change the Windows 11 computer settings so that the folder does not appear automatically when you insert the USB memory.
On a Windows 11 computer, when you insert a USB memory, a folder automatically appears by default. What can be done to stop this?
How to disable autostart of USB memory from settings?
Now, let’s disable the USB memory from starting automatically from the Windows 11 computer settings.
First, right-click “Win (Start)” and open “Settings”, select “Bluetooth and devices” and select “Autoplay” in the right window.
If you turn off the “Use autoplay for all media and devices” option, autoplay for all media such as CD/DVD/SD card/USB storage will be disabled.
However, with this, even if you insert a CD or DVD into the drive, it will not autoplay, so we introduce how to disable autoplay of USB memory only.
To do this, re-enable “Use AutoPlay for all media and devices” and select “Do Nothing” from the tab under “Removable Drives”.
Next, if you think it would be easier to autoplay, change the removable drive setting to “Open folder to view files (Explorer)”.
■ Procedure for disabling the automatic start of the USB memory
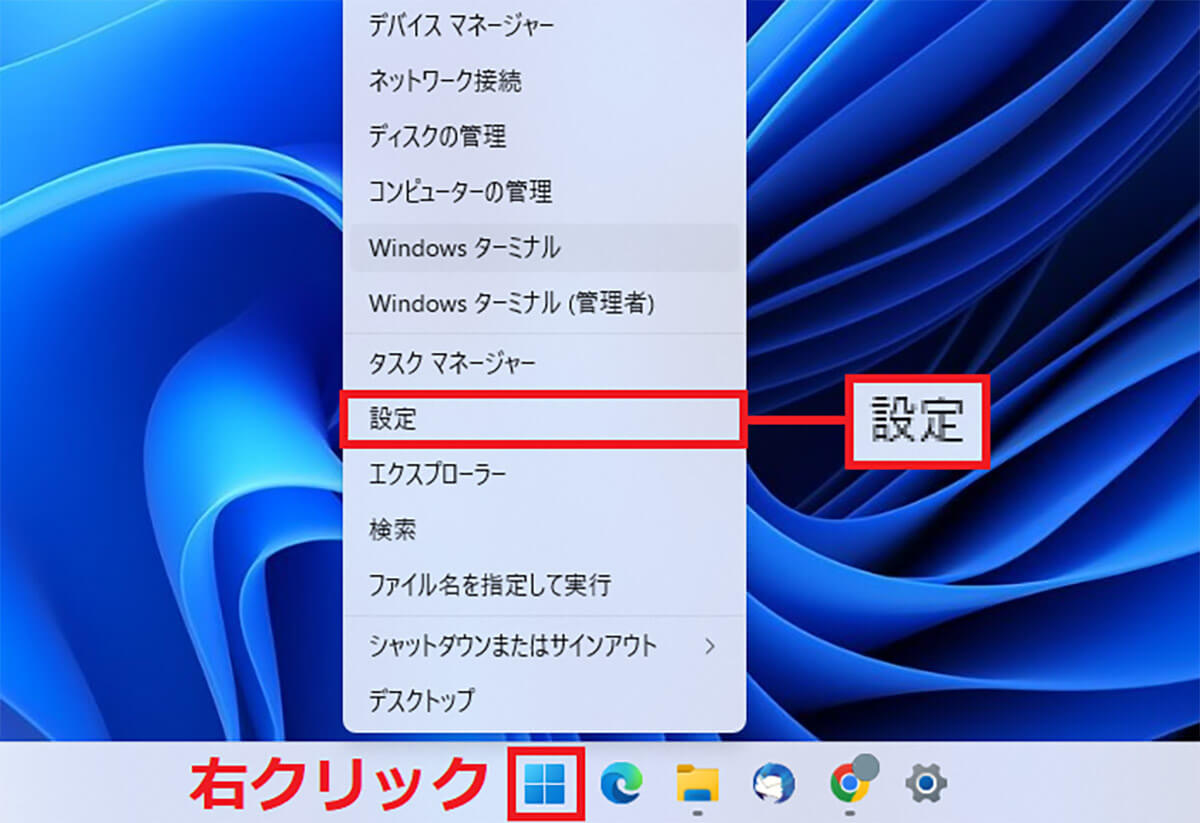
First, right-click the Win (Start) button on the taskbar and select Settings.
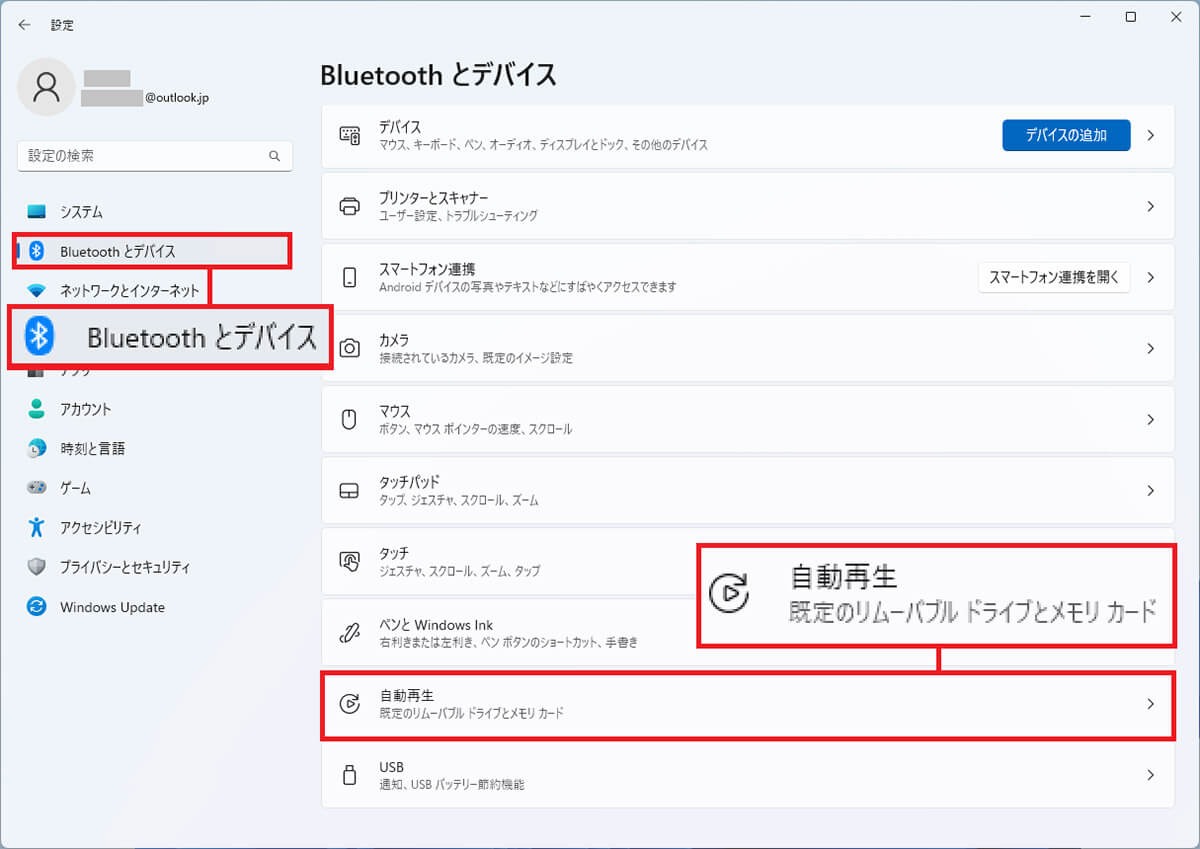
On the settings screen, select “Bluetooth & devices” on the left side and select “Autoplay” on the right window.
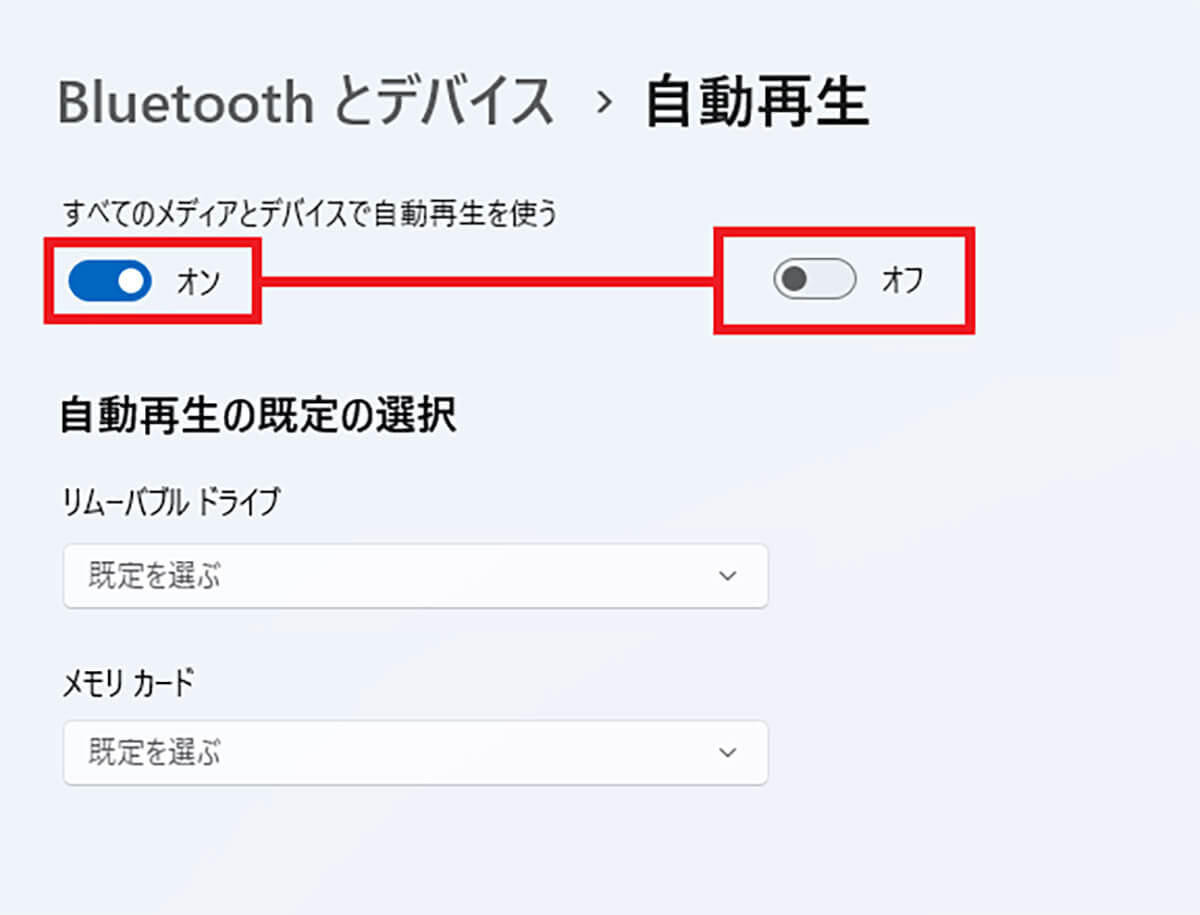
If you disable the “Use autoplay for all media and devices” option, autoplay for all media such as CD/DVD/SD card/USB storage will be disabled.
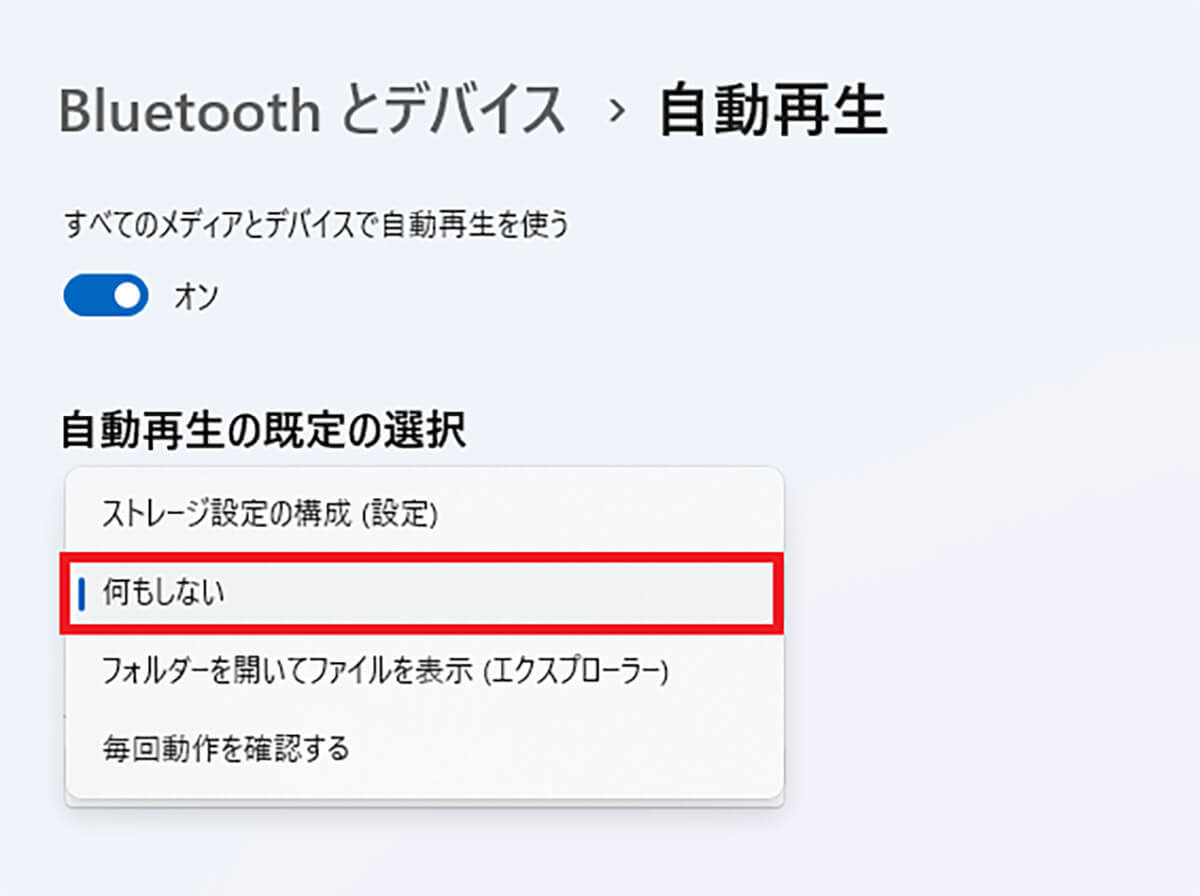
To turn off autostart for USB storage only, select “Do nothing” from the tab under “Removable drives”
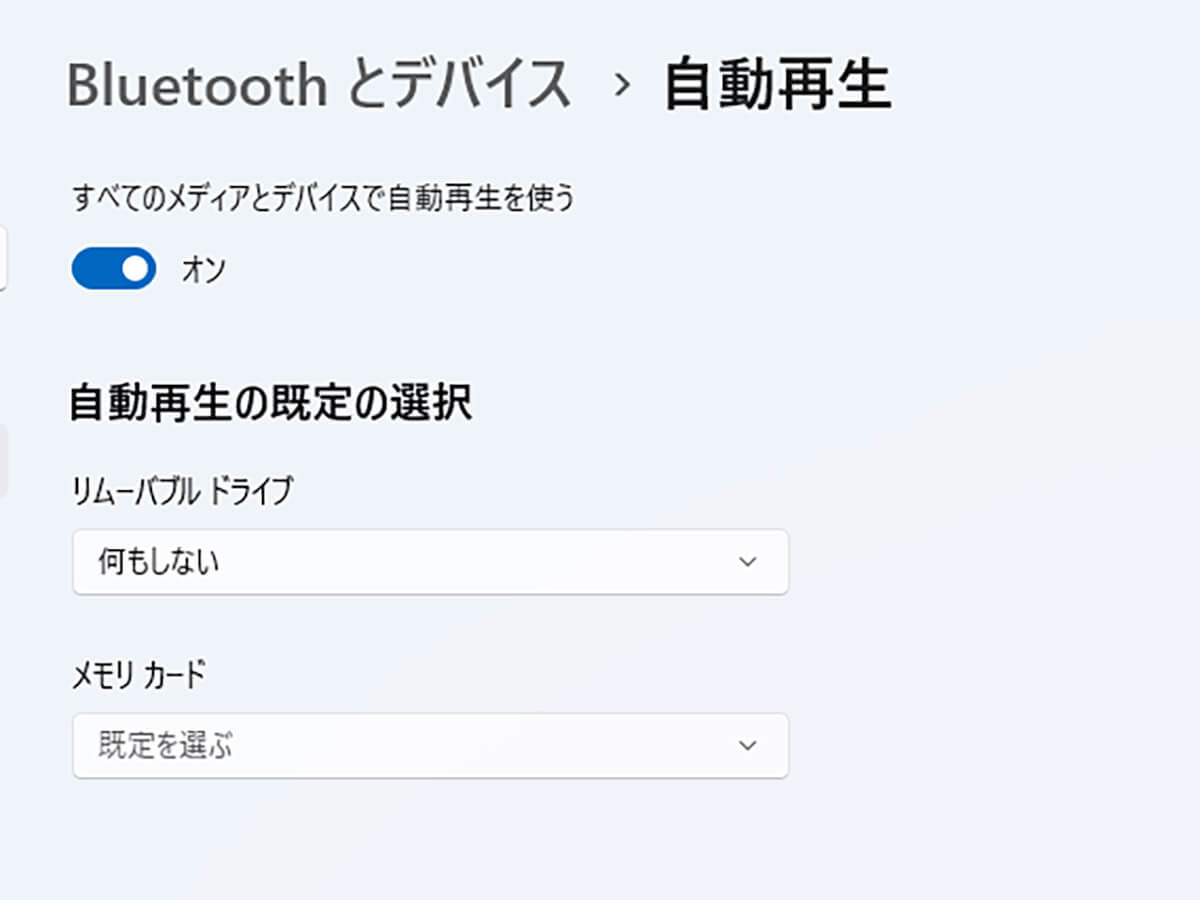
If the Bluetooth and device settings are in this state, the folder will not open arbitrarily even the USB memory is inserted.
■ Procedure to enable automatic start of USB memory
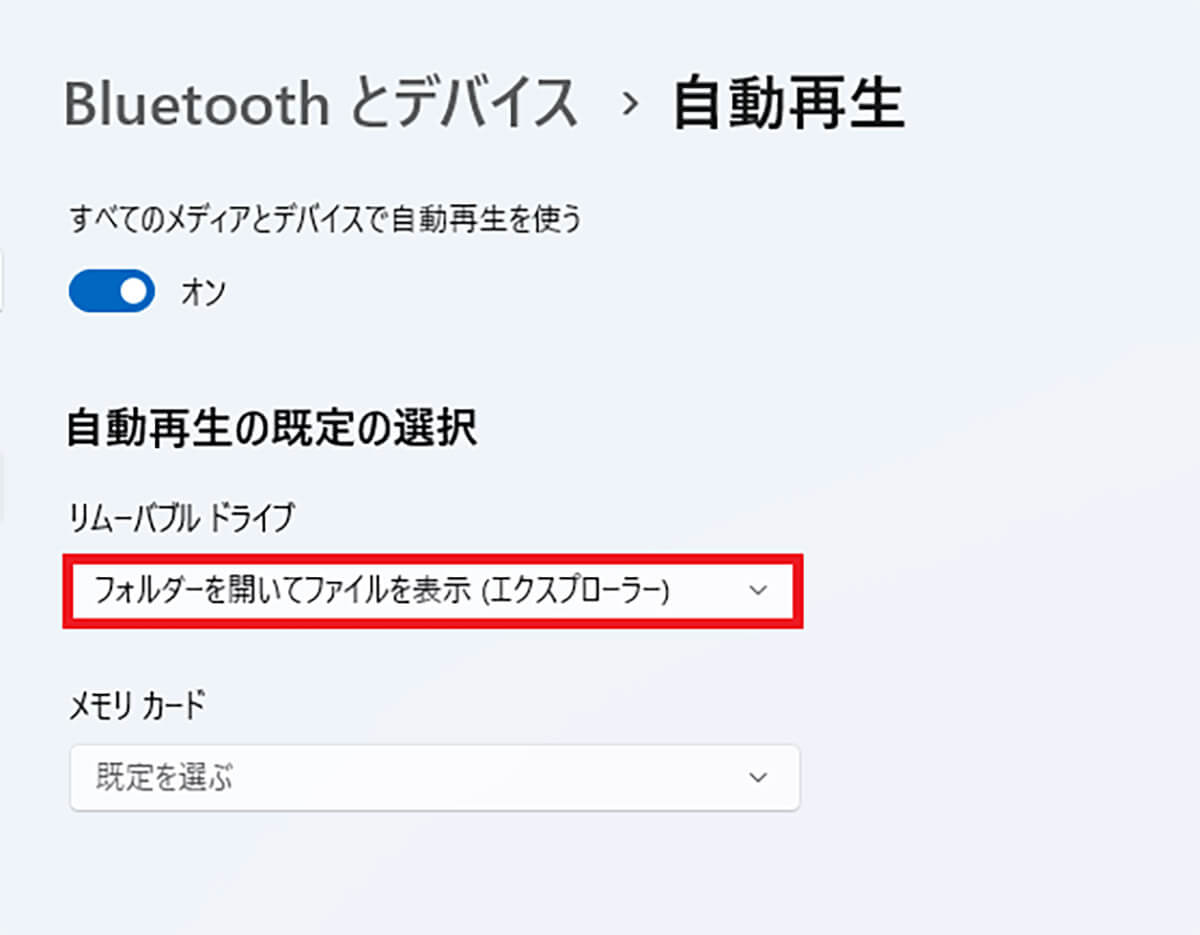
If you find it easier to autoplay, change the removable drive setting to “Open folder to view files (Explorer)”
summary
What do you think? It would be very convenient to be able to fully control how the computer behaves when you insert a CD or DVD, not just a USB memory, into the drive. If you are interested, check the settings once.
Refer to this article for instructions on how to automatically display folders when you insert a USB stick into your computer in Windows 10.
![[Windows 11]How to disable automatic display when a USB memory is inserted – OTONA LIFE [Windows 11]How to disable automatic display when a USB memory is inserted – OTONA LIFE](https://otona-life.com/wp/wp-content/uploads/2022/11/photo000-107-680x358.jpg)

