Here we can find problems both when downloading and installing these elements that we are talking about. At the same time, sometimes many users encounter more or less serious problems after updating their equipment. Therefore, the firm itself has been working for years to solve all this, although it does not manage to get rid of these failures completely.
It is for all this reason that in these lines we are going to talk about SetupDiag and how you can troubleshoot possible problems that may appear in Redmond’s software.
What is and how to install SetupDiag
First of all, we are going to clarify that when we talk about SetupDiag, we are actually referring to a free program from Microsoft itself. This can be very useful to diagnose any problem that we may find in Windows 10 updates. Next we will see how we can use this tool to find out the cause of a failure with the updates and take the appropriate measures. Let’s not forget that these faults to which we refer can appear with any of the updates that Microsoft sends us.
As a general rule, these problems with updates are often related to certain incompatibilities. These can be presented with some components of the PC, applications installed on it, with the integrated antivirus, etc.
This extends to both the large updates that it sends us approximately every six months, as well as the cumulative ones that it sends us monthly. Of course, the first thing we have to do here is download the program on our local team. Therefore, at this point we have the possibility of downloading the SetupDiag application from its official website, that is, from this link.
Once you have made them with a copy of the program as such, you have to know that the only requirements to use this software are where we have Windows 10 installed. Furthermore, it is also essential that the system has at least the version installed. NET Framework 4.6. In case we are not sure about it, the following command can be used to check the .NET version from your Windows computer. We just have to open a PowerShell window with administrator permissions so that we can perform the verification. We just have to type the PowerShell command in the search box on the Windows taskbar and right-click to run with administrator permissions.
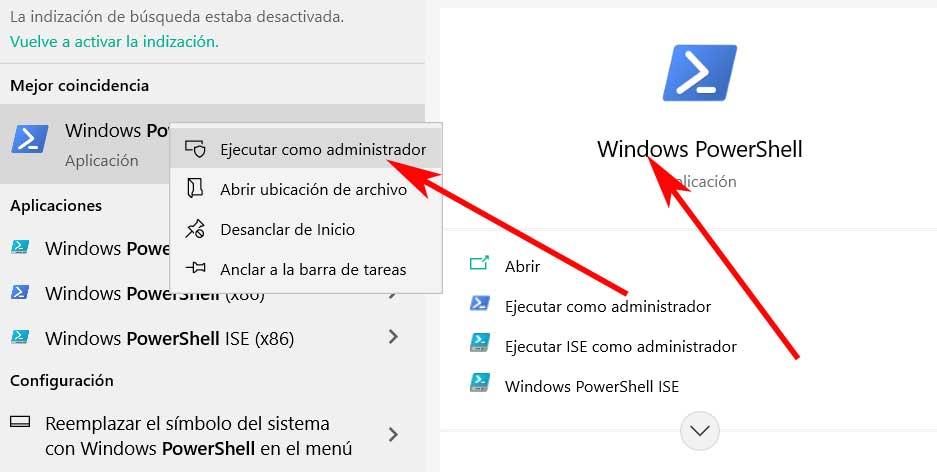
This way once we have the window in screen We just have to type the following command that we show you:
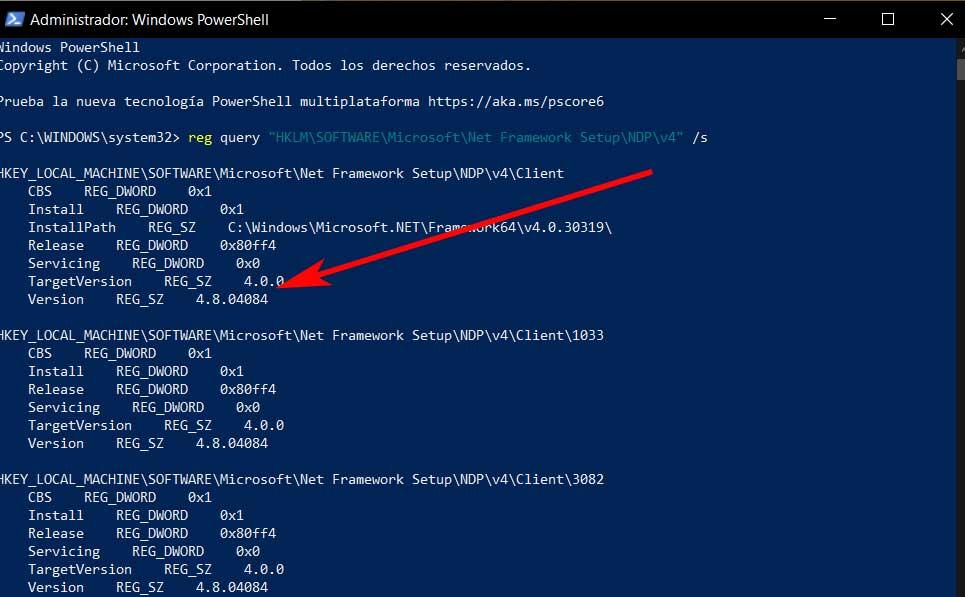
reg query "HKLMSOFTWAREMicrosoftNet Framework SetupNDPv4" /s
With this, what we achieve is to know the version of the .NET framework version that we have in our team. This way we will know for sure if we can use the SetupDiag tool and thus benefit from everything it offers us on a Windows 10 computer. In the event that we do not have this add-on installed on the PC. we can always download the latest version of .NET from this link.
Use SetupDiag to detect problems in Windows 10
Once we have made sure that we can install and run the application that we are talking about Microsoft without problem, let’s see how it works. The first thing we need to do is download the executable file for SetupDiag to a disk location. For example, we can leave the .exe directly on the desktop to have it more handy. Once in our possession we just have to double click on the new file.
As soon as we run the exe file a command prompt window will automatically open. At that moment the application will start up by itself, carrying out a series of automated analyzes. We must wait until the procedure is finished, something that will only take a few seconds. Actually, what the tool does is collect a series of reference information about various records Of configuration.
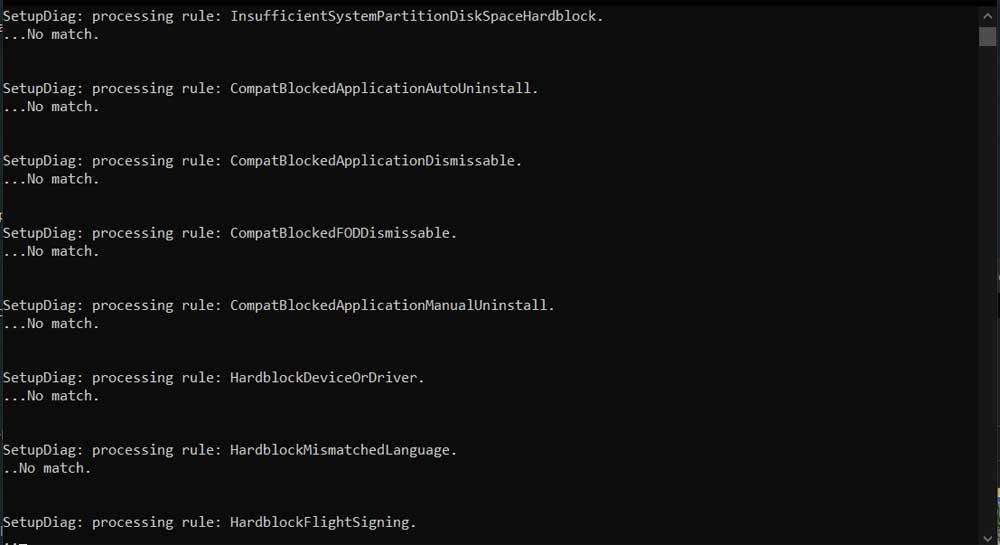
Also, it is worth mentioning that SetupDiag analyzes the entire Windows 10 system and compares it with more than 60 error scenarios. These include detection of boot failure, insufficient system partition disk, PC component failure, and much more. The best of all is that the entire process takes place in just a few seconds, as we have mentioned before. When the diagnosis is completely finished, in the same disk location where we saved the executable, three new ones will be created records.
How to view errors detected in updates
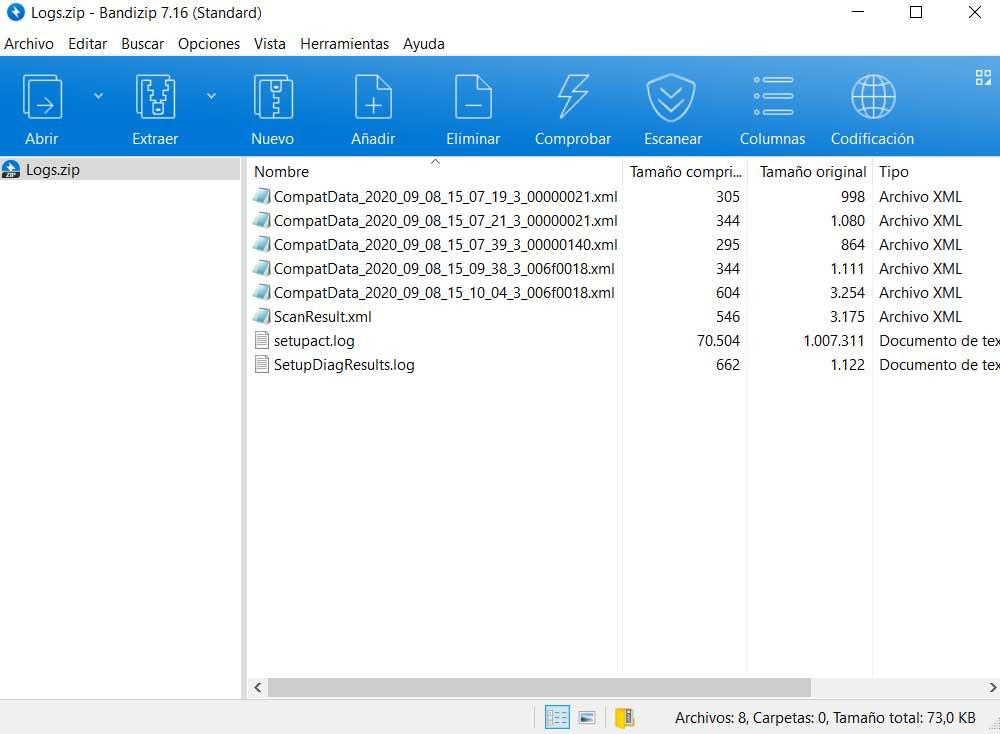
Specifically, we find a registry file, a configuration file and a tablet that the program itself generates automatically. Therefore, we only have to see the results using a compression program with support for Zip files with which we open the compressed file called Log.
How to view problems detected by SetupDiag
Within the compressed file called Log that we are commenting on, we find several text files that we can open with any text editor. In this case, the one that interests us is the one with the name of SetupDiagResults.log, which for example we can open with the Windows notepad. It will be here where we find all the logs and errors that SetupDiag has generated with the previous analysis.
As you can imagine the amount of mistakes that we can find here is huge. In the diagnostic file generated by this tool, these are specified by the corresponding detected error code. In addition, a website is included that directs us to this link.
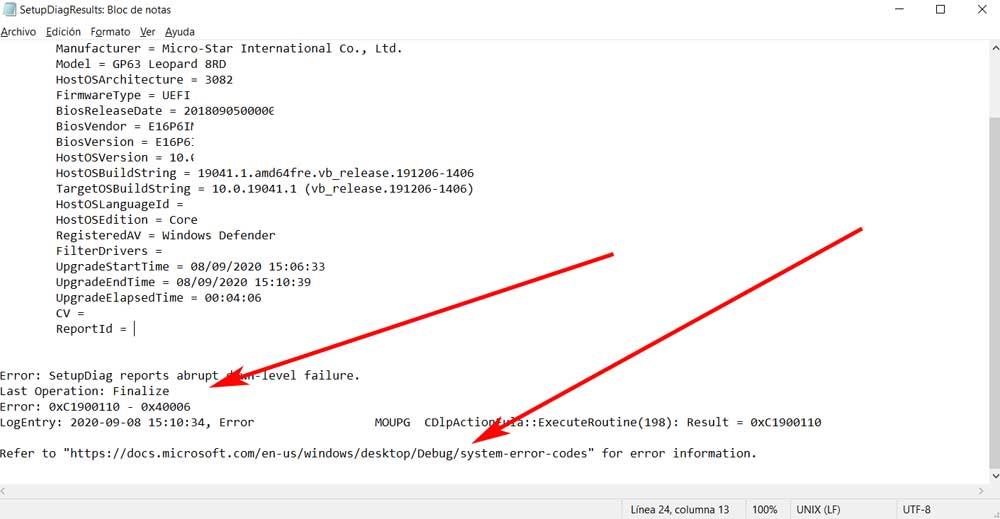
It refers to a website from Microsoft itself that will help us to interpret the error codes that have been shown here. Once we have analyzed and interpreted the errors detected with the Windows 10 updates, we can take the necessary measures to solve them. These can be of all kinds, since these errors with the updates can occur for a multitude of reasons.
–
