
With Windows 11 just presented in society, now comes the controversy. On the minimum requirements to upgrade to the new Microsoft operating system two important new features arrive: TPM 2.0 and Secure Boot (Secure Boot, in English). Here, the problem comes because many computers do not have these options, mainly from 2015 onwards, and in other more modern ones, they are disabled.
In fact, it is common for parts mounted computers to have the TPM option disabled by the motherboard manufacturer. The solution is to enter BIOS and enable this feature. Thus, in a few minutes we will see how PC Health Check goes from rejecting the update to Windows 11 to indicating that our equipment is fully compatible.
How to check the TPM version of our equipment
As we said, Windows 11 requires TPM 2.0 to perform the update. Therefore, before entering BIOS and touching anything, we are going to check if the TPM chip is enabled (it is common in laptops) to see if the version is compatible.
- In the search box, we type tpm.msc.
- We open the first search result to access the Trusted Platform Module Administrator.
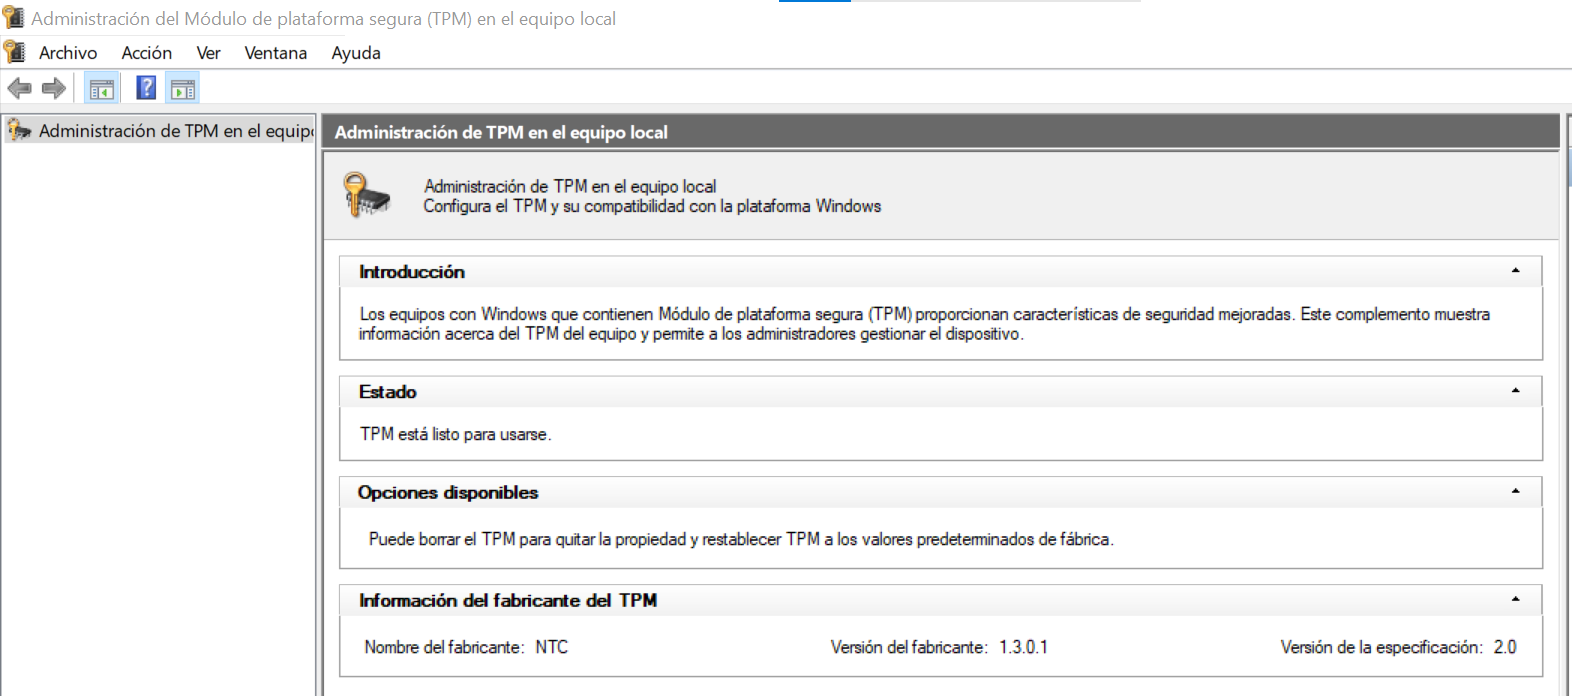
Here, we must look at the bottom, where the version of the specification is indicated. If we see version 2.0, then our computer should be compatible with Windows 11 in this section. In case PC Health Check continues to indicate that we cannot update, we will have to look for other causes, which will probably be related to the graphic driver of the computer manufacturer.
How to enable TPM from BIOS
To enable TPM 2.0 by firmware, as is usually the case on desktop computers, we will have to access the BIOS. To do this, we must press the corresponding key during the start of the equipment. Usually this is F2, F8, F12, or Esc, although we can confirm it in the manual of the manufacturer or the motherboard.
If we have Windows 10 installed by UEFI, we can access the BIOS from the Settings app. Specifically, we will have to go to Update and security> Recovery. Here, click on “Restart now” in the “Advanced startup” section.
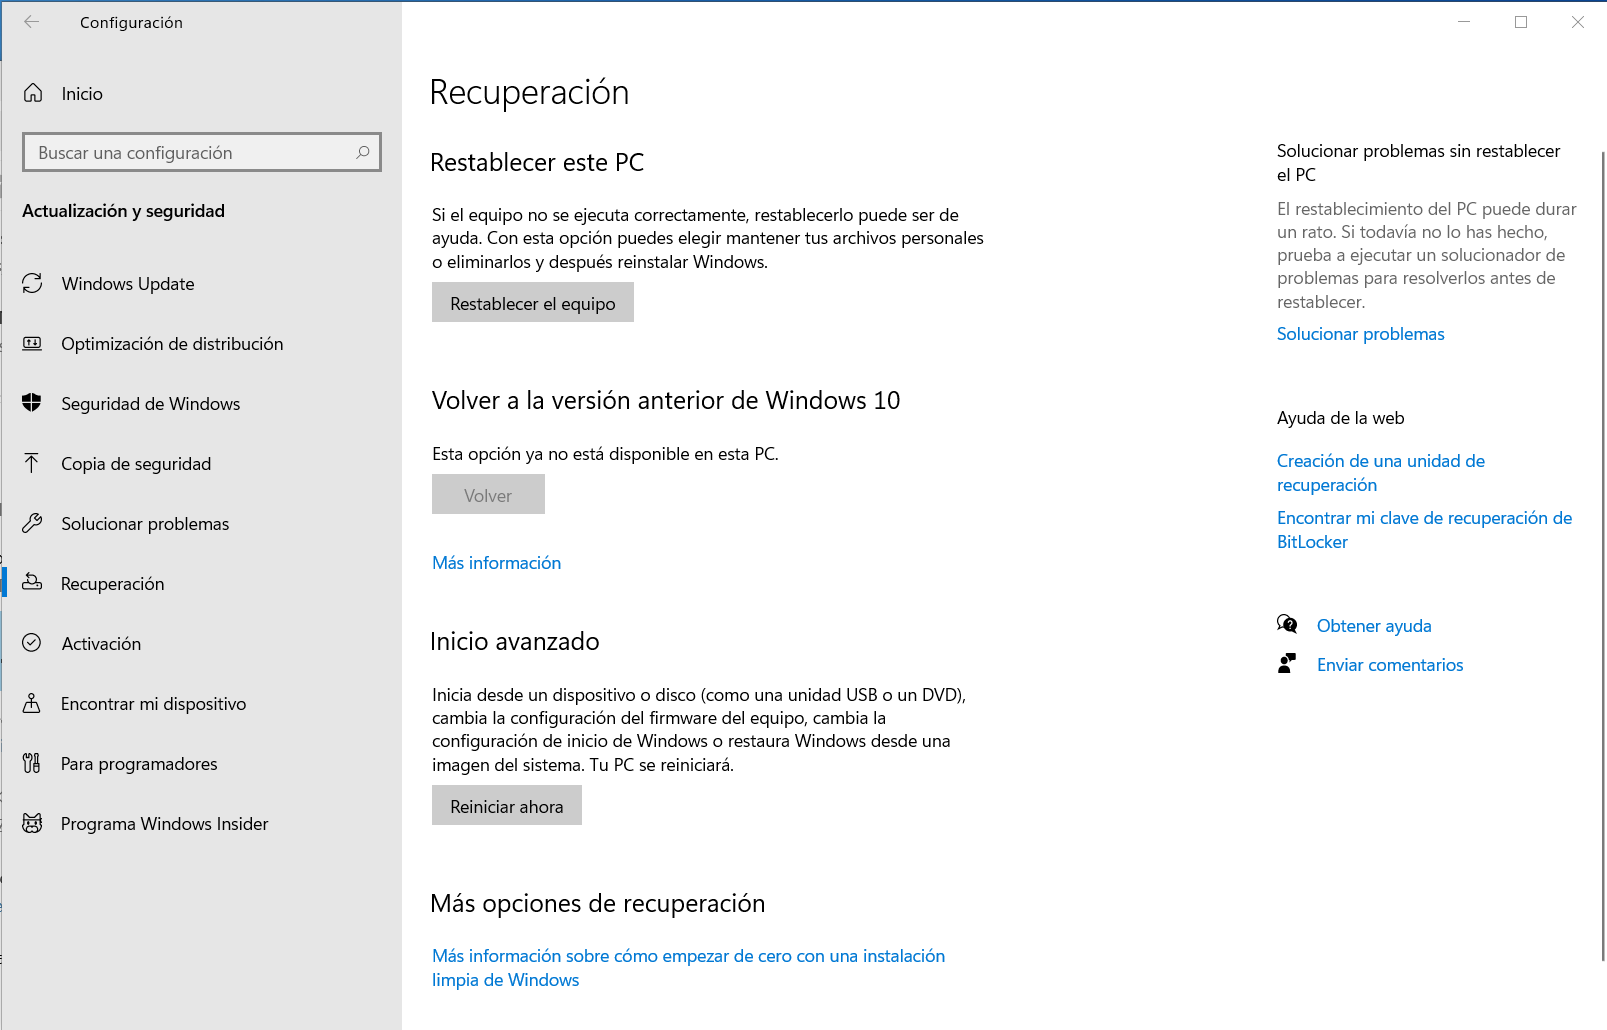
The computer will restart and a menu with a blue background will appear. On the first screen, click on “Troubleshoot” and then on “Advanced options.” Finally, we click on “UEFI Firmware Configuration”. Finally, we confirm the restart and the computer will enter BIOS directly.

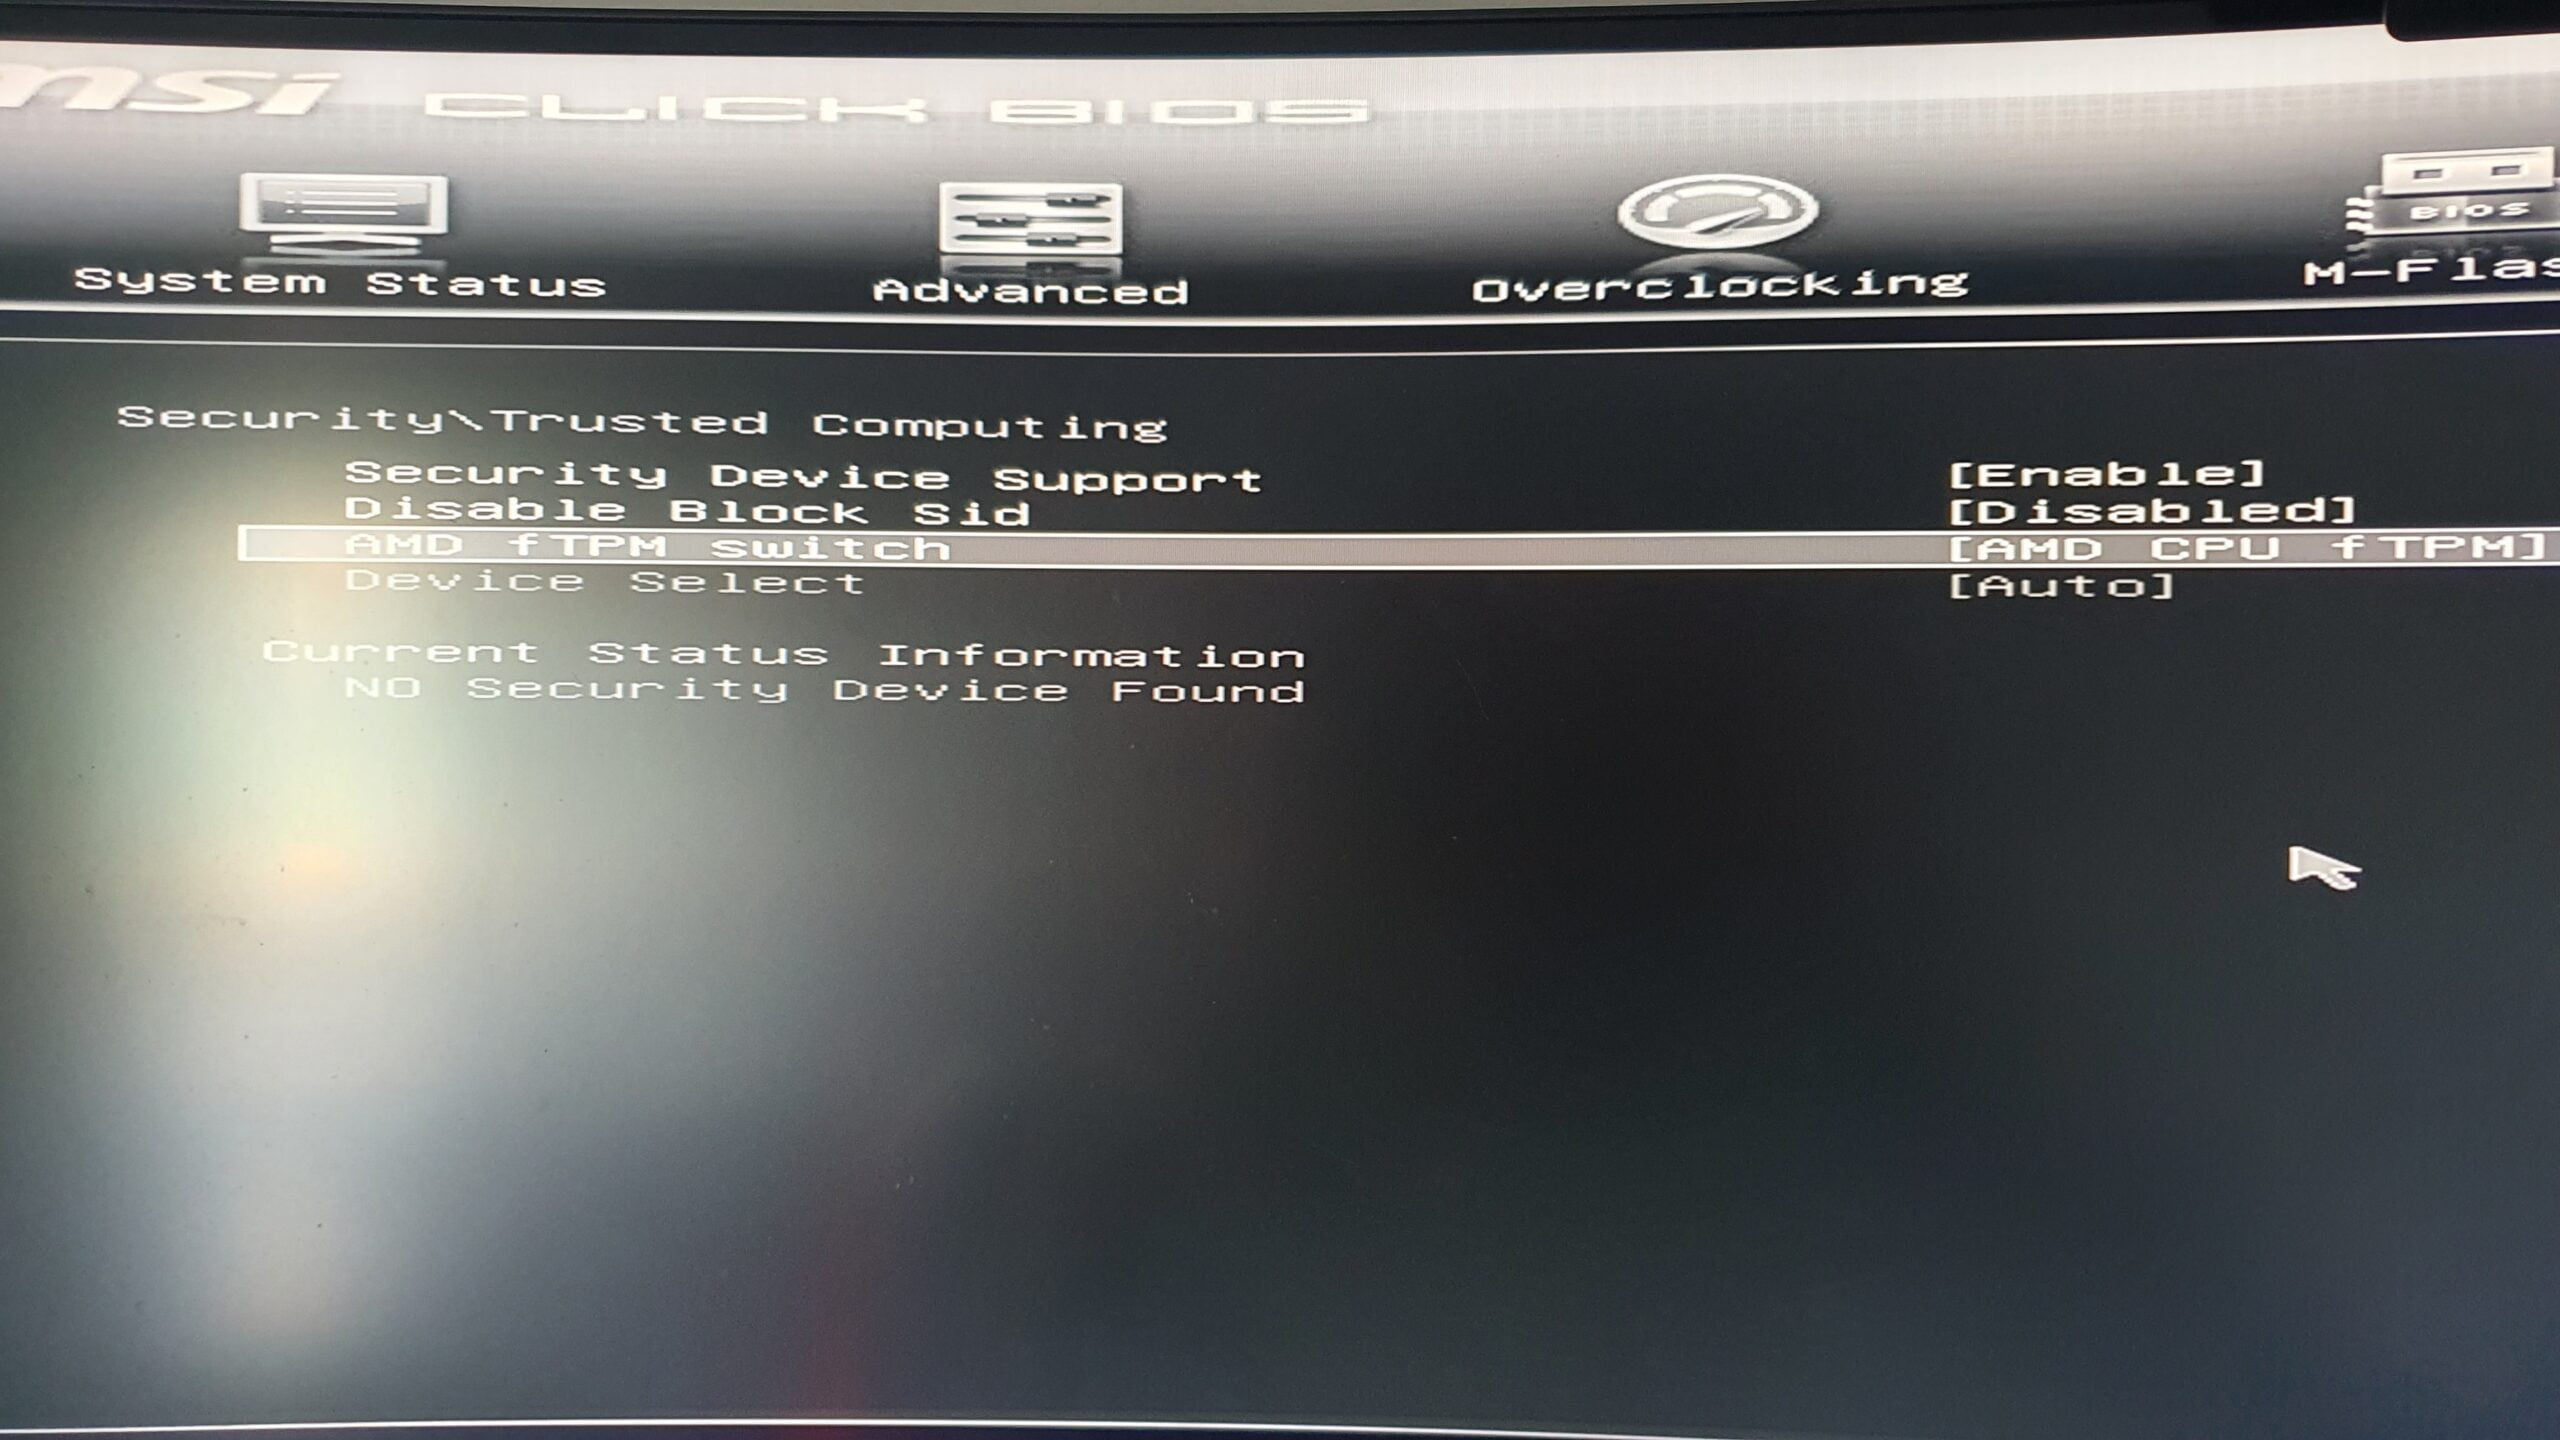
The next steps will depend on the manufacturer, although they are usually similar on all motherboards. In this case, we will detail the process for MSI boards with ClickBIOS.
- We go to the “Security” section.
- Click on «Trusted Computing».
- Click on “Security Device Support” and mark “Enable”.
- We make sure the “AMD fTPM Switch” option is enabled. For Intel processors, “Intel Platform Trust Technology” will appear.
How to enable Secure Boot from BIOS
Secure boot, too, is one of the requirements to upgrade to Windows 11. Similarly, it is also usually disabled by default on desktop computers. To enable it, we will follow the following steps from the BIOS.
- We go to the «Advanced» section. On boards from other manufacturers, it is common to find it in the “Boot” section.
- Click on “Windows OS Configuration”.
- We check that in “BIOS UEFI / CSM Mode” it says “UEFI”.
- We click or select “Secure Boot”.
- Click on “Secure Boot Mode” and choose “Custom”. If a warning about security codes appears, click on «Yes».
- Click on “Enroll all Factory Default Keys” to establish the safe boot keys.
- Finally, click on “Secure Boot” and choose “Enabled”.

It is important that you check what we indicated in step 3, since UEFI is an essential requirement to install Windows 11. In the event that “Legacy” or “CSM” appears, we must bear in mind that we will have to change it and reinstall our copy of Windows 10 or perform a clean install of Windows 11 once the installation ISO image is released.
Finally, we save the changes made from the “Save and Exit” section by clicking on the “Save Changes and Reboot” option. If we now reopen the PC Health Check application, we will see that the equipment is compatible with Windows 11.
–

