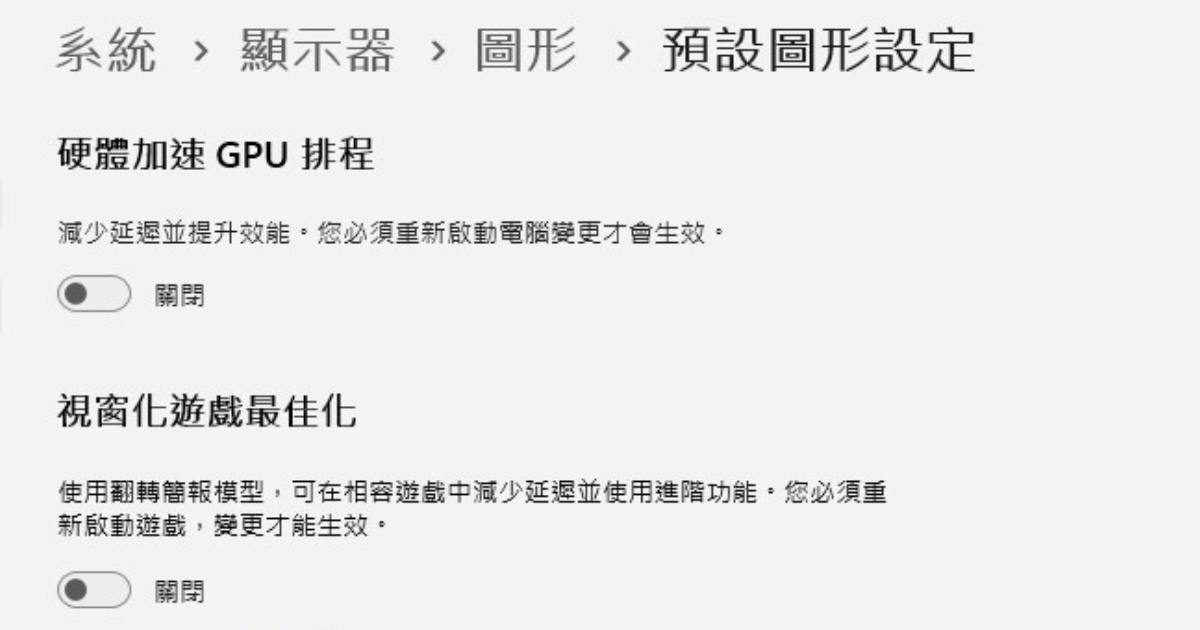
In the latest Windows 11 operating system, Microsoft has introduced a new function called Hardware-Accelerated GPU Scheduling (Hardware-Accelerated GPU Scheduling), which allows the graphics card to actively participate in the allocation of computing tasks, thereby reducing the pressure on the CPU. Thereby achieving the improvement of computer performance.
However, this feature currently only supports graphics cards that have been released recently, and some games or software may experience unexpected errors or instability when running after GPU scheduling is enabled. Closed to facilitate subsequent debugging.
Manually disable the GPU scheduling function
Step 1. Right-click the Windows icon on the taskbar and select “Settings”.
Step 2. After opening the setting app, find “System” on the left column, and then click “Display”.
Step 3. After the screen jumps, scroll down the screen to the bottom and find “Graphics” in the “Related Settings” section.
Step 4. After entering the graphics page, click “Change Default Graphics Settings” in the “Default Settings” section at the top.
Step 5. After the screen jumps, turn off the “Hardware Accelerated GPU Scheduling” option, and finally restart the computer.
Step 6. If the graphics card is older or has a lower specification, when entering the default graphics setting screen, you will not see the hardware-accelerated GPU scheduling related options.
This article was simultaneously published in PC home magazine
Welcome to the PC home magazine fan group!


