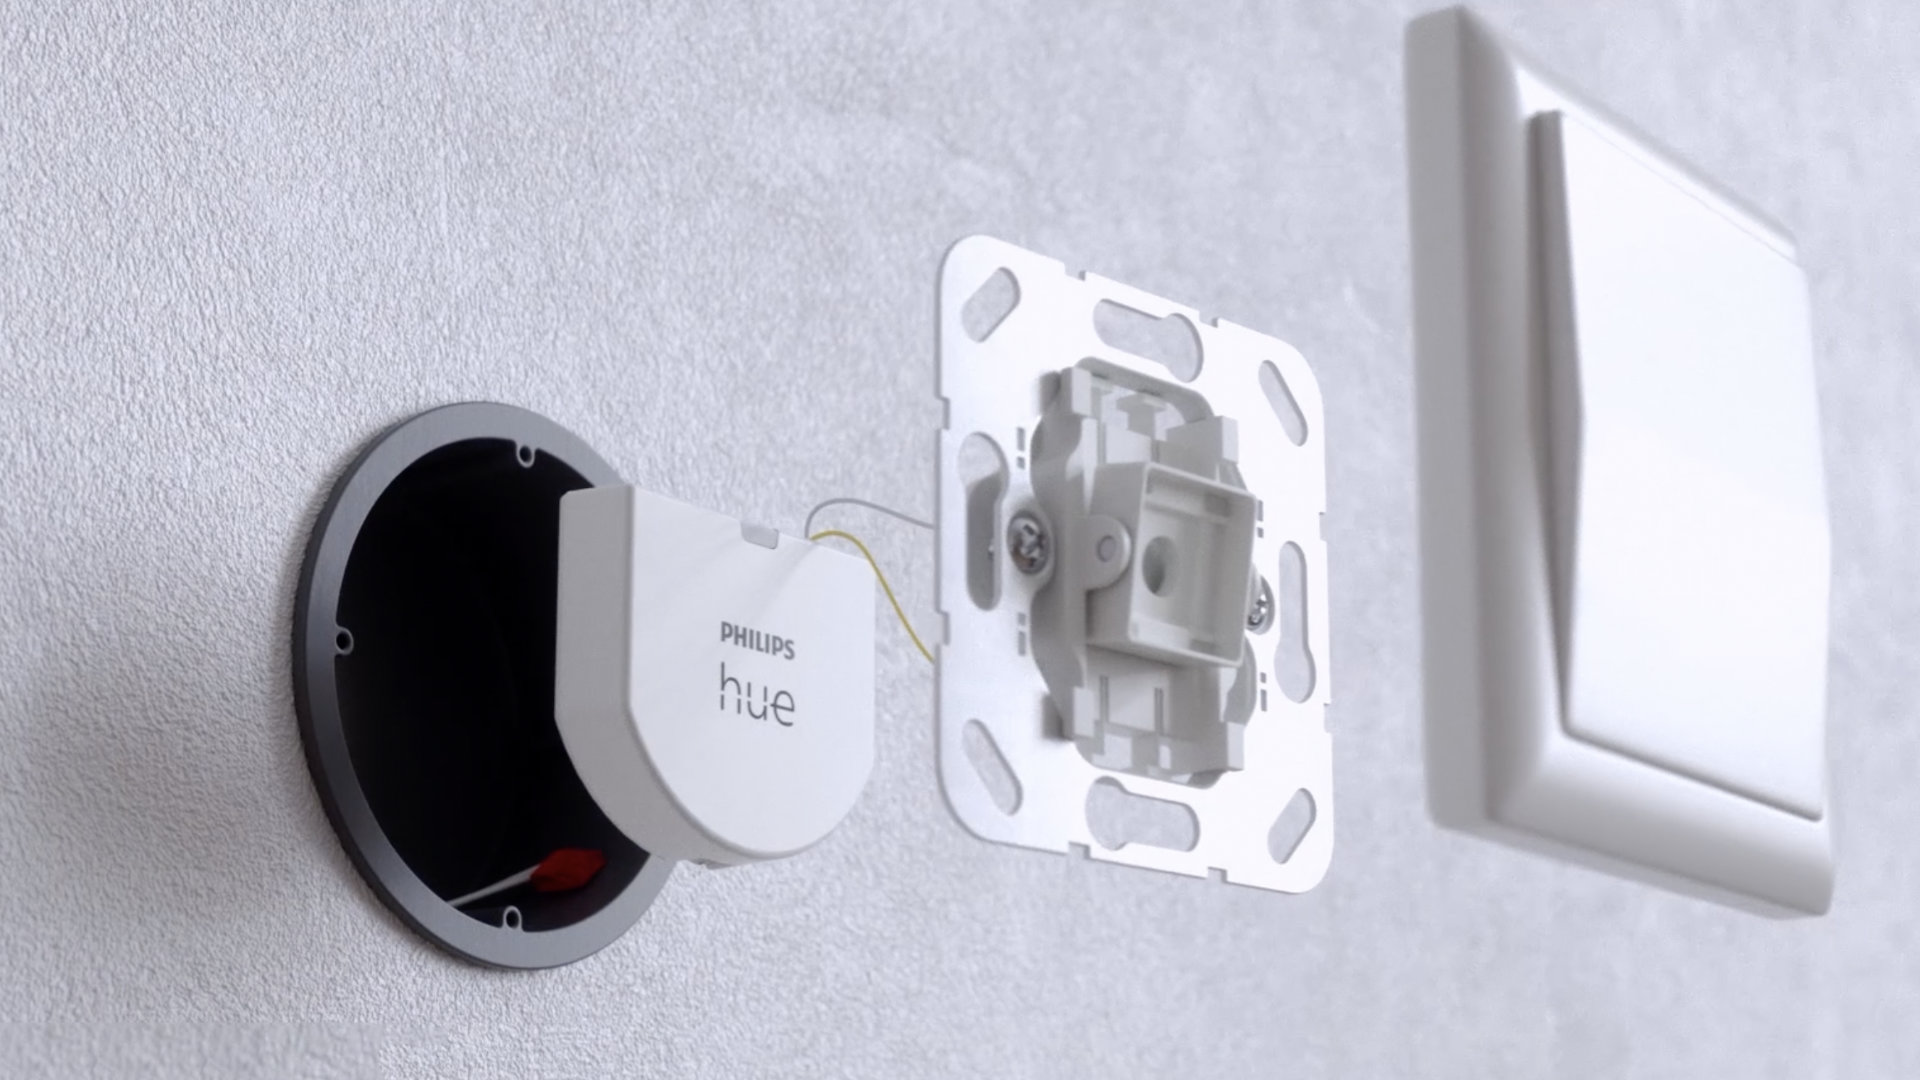
There is a way to control your connected bulbs from your classic switches at home. Philips Hue wall modules can turn your electrical installation into a “smart” circuit. Here’s how to install and use them.
Philips Hue bulbs are a great way to add some ambiance to your home. They can vary the brightness or the hue to better match the light atmosphere, depending on the time of day or your mood at the moment. You can even sync them with Spotify if you want to turn your apartment into an extra nightclub.
Unfortunately, smart bulbs also have a major problem: if their electrical circuit is cut, they are no longer usable. If you installed a bulb connected to the ceiling, you cannot control it with your classic light switch, because cutting the power prevents it from working properly. Smart bulbs need constant power to be commanded to turn on and off from your smartphone, home assistant, or smart switch.
To put it simply, even when they no longer emit light, connected bulbs consume a tiny bit of electricity to power the chip that makes them precisely “connected”. It is for this reason that we cannot cut the electricity at the switch with connected bulbs.
But if you’ve ever had company in your home, explaining to someone that you shouldn’t use switches or your delicate installation might break down can sometimes be a surprising exercise. Fortunately, there is a method to convert your classic switches into connected switches: use the switch modules marketed by Philips. These tiny “wall switches” are sold per pack of 1 Where of 2, at 40 or 70 euros respectively.
How does a Philips Hue wall module work?
The idea behind these little gadgets is to replace your “classic” electrical installation and to use switches present at home to control your connected bulbs.
The module must in fact be connected to the two poles of your switch and depending on the position of this switch, the accessory sends the order to turn the bulbs on or off to your Hue bridge. Everything therefore happens without cutting the power supply circuit of the lamp, which thus remains always reachable.
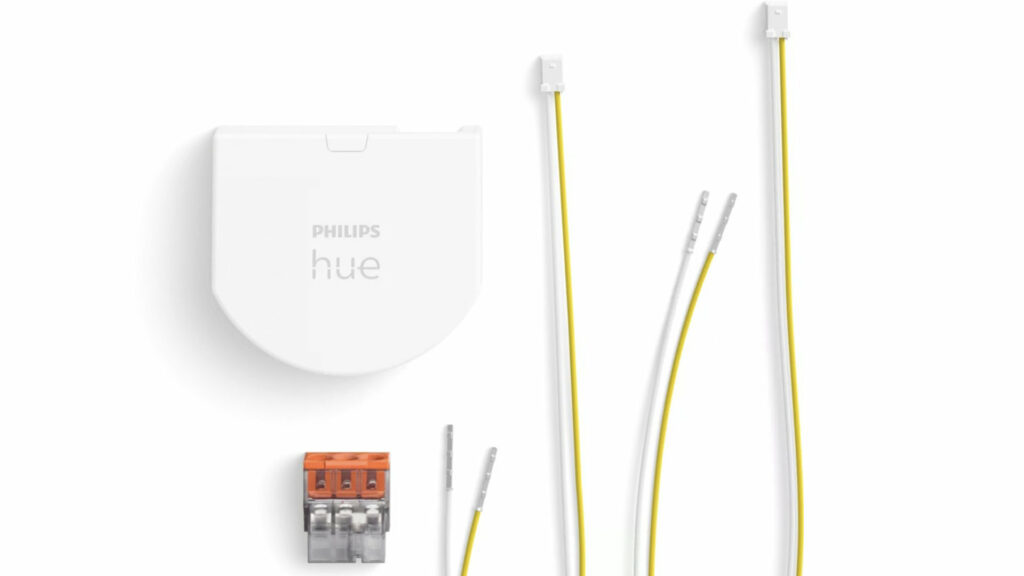
This DIY, completely invisible, avoids having to give a home automation course to all the people who want to turn on the light in your home. It also allows you to turn on all the connected bulbs in a room with a single switch movement.
Here’s how to install these little gadgets.
Precautions for use to avoid any risk of electrocution
Installing Philips Hue wall modules is not terribly complicated as long as you can hold a screwdriver in your hand and know how to turn off the power at home.
Because yes, the first thing to do before doing any manipulation is to cut the current on the electrical circuit on which you are going to work. This is done at the circuit breaker. You can either turn off all the power in your home or fumble around to find which section of the circuit breaker is controlling which bulbs.
We will repeat it, but don’t start anything until you’ve made sure you’ve turned off the power on the switch you want to hack. It’s very simple to do it: leave your switch in the On position, then lower the fuses of your circuit breaker one by one until your lighting goes off.
Then, you just have to arm yourself with a Phillips screwdriver, a little patience and a Philips Hue wall module pack.
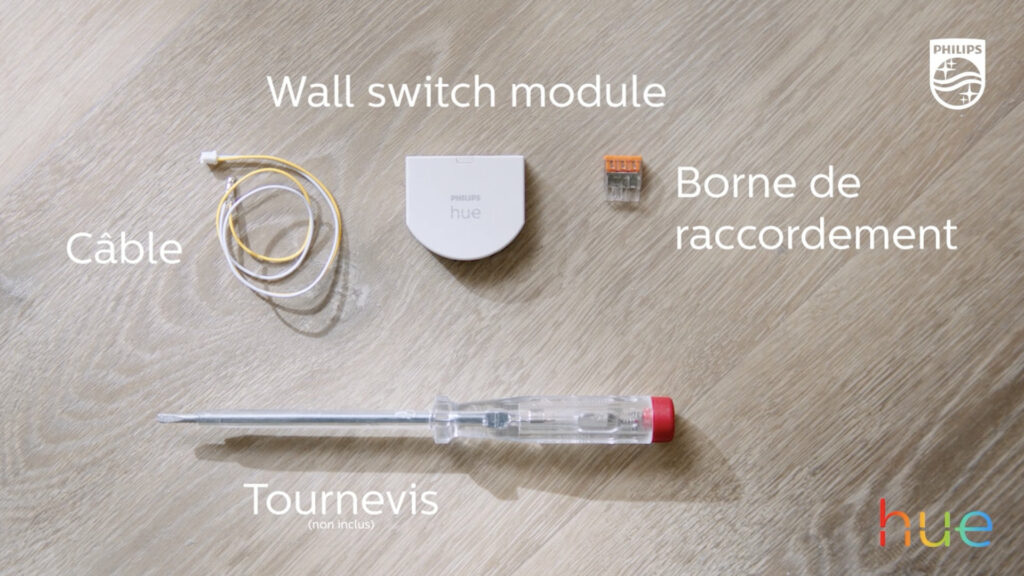
How do I install a Philips Hue wall module?
Once the power is off, we can get down to business. To begin with, let’s start with the purely electrical aspect of the maneuver before looking at the software operation of these modules.
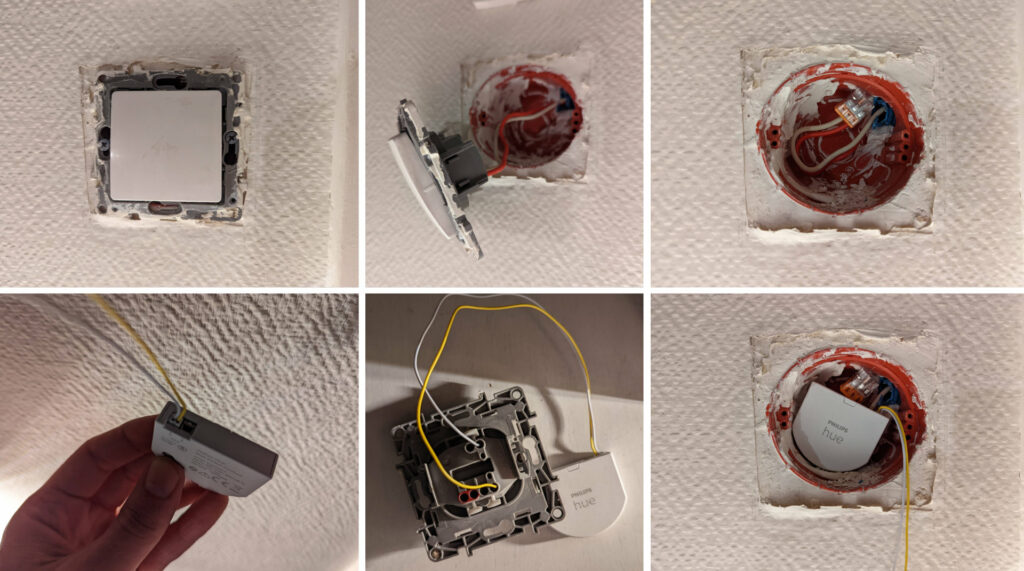
- Start with remove the switch cover (the plastic plate around the moving part). You just need to pry between the wall and the plate with a flat screwdriver.
- Store your cache in a place where you are sure to find it.
- Remove the two screws that hold the switch plate on the wall and put them away just as preciously.
- Carefully peel off the plate from the wall without pulling it too violently.
- Remove the wires connected to your switch by pressing the associated push mechanism and gently pulling on it.
- Store the two wires in the connection terminal provided with the module (pushing fully to the bottom).
- These little plastic accessories, also nicknamed ” bornes Wago Are used to create continuous contact between the two wires. Thus the power wire and the lamp return wire will always be connected to each other. This means that your bulb will always be on, which is the goal.
- Push the two cables and the wago terminal to the bottom of the flush-mounting box (the space dug in the wall where the wires come from).
- Grab the supplied cables in the module box and install them on Input 1 of the Hue box.
- Plug in the yellow cable on location “1” your switch and white on location “2”.
- If the ignition is correctly made, a light should come on on the small Hue box. This means that it is ready for use.
- Install the Hue box at the bottom of the flush box.
- Replace the plate using the two screws (which must bite into the holes provided for on the side of the flush-mounting box).
- Put your cache back.
Configure your Philips Hue wall module
If you have successfully completed all of the previous steps without a problem, then congratulations, you have just installed a Philips Hue wall module. Reward yourself with a large glass of water and go back to the circuit breaker. You will now have to configure the module to tell it which bulbs it will have to control.
- Once the power is restored, launch your Hue app.
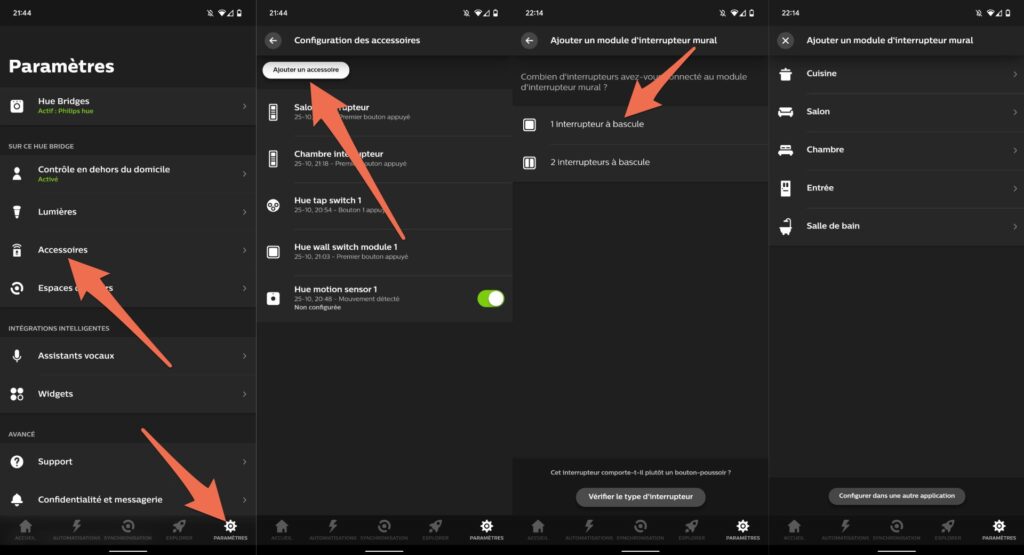
- Go to Settings — Accessories — Add an accessory — Hue Wall Switch Module.
- Press on Following in the interface.
- Back and forth on the switch until it is detected by the application.
- Choose the type of switch that matches (single or double).
- Choose the room to be controlled via this switch.
- Choose the light scenario to launch when using the switch.
- Press on Save.
Your module should be installed and if you vary the position of your switch, your connected bulbs should react. Congratulations, behind a very classic switch you have installed a “brain” which allows it to control your connected bulbs.
Remarks and conclusion
Since the small module is not directly connected to current, it is powered by a button cell battery. Philips promises 5 years of autonomy before having to change it. If your switch is low on power, your app will notify you. It will then be necessary to re-dismantle the switch and replace the battery (a simple CR2450) by removing the small screw on the bottom of the box.
While these modules are very practical, they are not necessarily easy to install for everyone. Anyone who is intimidated by the idea of tweaking the electricity in their home is unlikely to go through all of these manipulations. If you have some experience with PC assembly and disassembly though, the logic is a bit similar.
The cables must be plugged in to the correct places to establish contact. If you take all the necessary precautions, you are not at great risk. In addition, tampering with your electrical installation is a very good way to learn a little more about the operation of our switches and circuit breakers.
But as practical as these modules are – and as satisfying as it is to play the apprentice handyman – the very existence of these little gadgets proves that home automation is still a complicated field, reserved for those who have the time. and the energy to go out valiant, a screwdriver in hand to tweak everything.
If you want to equip yourself with connected bulbs, Hue or not, consult our dedicated buying guide.
