
Here’s the content you requested:
Destiny 2 Sundered Doctrine Dungeon Guide: Complete Walkthrough
Table of Contents
- Navigating Destiny 2’s Sundered Doctrine Dungeon: A Complete Guide
- Unraveling the Mysteries: A Deep Dive into Destiny 2’s Sundered Doctrine Dungeon
- Navigating Destiny 2’s Sundered Doctrine Dungeon: A Comprehensive Guide
- Starting the Descent
- Rolling Balls and Safe Alcoves
- The Wheels of Fate
- Encounter 2 – Zoetic Lockset
- Visualizing the Journey
- Conclusion
- Destiny 2: Mastering the Sundered Doctrine Dungeon
- Unveiling the Mysteries of Destiny 2: Sundered Doctrine Dungeon Guide – Encounter 3: Kerrev, The Erased
- Unveiling the Mysteries of Destiny 2’s Sundered Doctrine Dungeon: A Comprehensive Guide
- Unveiling the Mysteries of Destiny 2’s Sundered Doctrine Dungeon: A Comprehensive Guide
The Sundered Doctrine dungeon is the latest addition to Destiny 2, taking place on the ship of Rhulk, first Disciple of the Witness, located in Savathun’s Throne World. This guide will walk you through every encounter to help you complete the dungeon successfully.
Opening Encounter
Follow the path downstairs to a large room where Ikora’s Guardians are examining artifacts. The large panel of buttons here may be useful for subsequent quests. Take a right from here out of the room.Run across a bridge to a closed door.
Jump up to the left and find an opening a short way ahead on the right. Follow the path and you’ll approach your first enemies: some Dread and two Subjugators. These Subjugators are not boss Subjugators and they can be crowd controlled and taken out with Finishers.
Destiny 2 sundered Doctrine Dungeon Guide: Find All Secrets
Before jumping in,check out our Destiny 2 DPS guide and our list of the best PvE weapons in Destiny 2 to ensure you’re battle-ready.
Destiny 2 Sundered Doctrine Dungeon Release Date
The Sundered Doctrine dungeon launches on Friday, February 7, 2025, at 9 a.m. PST / 12 p.m. EST.
how to start the Sundered Doctrine Dungeon in Destiny 2
To enter, you’ll need the Final Shape Dungeon Key.
Destiny 2: Sundered Doctrine Dungeon – Encounters & Loot Table
The next dungeon in The Final Shape expansion is titled Sundered Doctrine,located aboard Rhulk’s Pyramid Ship on Savathûn’s Throne World. For players looking to take on an extra challenge, Contest mode will be active during the first 48 hours after its release. More details are provided in the guide.
Opening Encounter
Follow the path downstairs to a large room with Ikora’s Guardians examining artifacts. The large panel of buttons here may be useful for subsequent quests. take a right from here out of the room. Run across a bridge to a closed door.
Jump up to the left and find an opening a short way ahead on the right. Follow the path and you’ll approach your first enemies: some Dread and two Subjugators. These Subjugators are not boss Subjugators and they can be crowd controlled and taken out with finishers.
These are the contents from the provided URLs.
Embarking on the Sundered Doctrine Dungeon in Destiny 2 can be both exhilarating and challenging. This guide will walk you through the intricacies of this dungeon, ensuring you’re well-prepared for the journey ahead. whether you’re a seasoned Guardian or a newcomer, this comprehensive walkthrough will help you navigate the dungeon with confidence.
The initial Encounter
Your adventure begins with a straightforward task: defeating all enemies in the initial chamber. Once the area is secure, proceed to the back right room. In the far left corner, you’ll notice a block that can be jumped on, which will lower a platform. Descend this platform until you enter a large room teeming with more enemies and another non-boss Subjugator.
The Red Lights
After dealing with the Subjugator, look towards the back of the room and scan upwards. You’ll spot two red lights. Directly beneath these lights, on the ground floor, is a small waterfall concealing an opening. Drop down through this waterfall to reach the first major encounter.
!Destiny 2 Sundered Doctrine Dungeon Guide – Complete Walkthrough
The first Encounter
The first encounter is a critical phase where strategic positioning and team coordination are key. This section of the dungeon is designed to test your reflexes and tactical prowess. Surviving this encounter requires a keen eye and rapid reflexes.
The Path Forward
Once you’ve successfully navigated the first encounter, continue your journey through the dungeon.The path ahead is filled with challenges, but with the right strategy and teamwork, you’ll find yourself overcoming each obstacle.
Key points Summary
To help you stay on track, here’s a summary table of the key points covered in this guide:
| Step | Description |
|——|————-|
| 1 | Defeat all enemies in the initial chamber. |
| 2 | Proceed to the back right room and jump on the block to lower the platform.|
| 3 | Descend the platform into the large room with more enemies and the Subjugator. |
| 4 | look for the two red lights and drop down through the waterfall. |
| 5 | Navigate the first major encounter with strategic positioning and team coordination. |
Final Thoughts
The Sundered Doctrine Dungeon in Destiny 2 is a thrilling adventure that demands both skill and strategy. By following this comprehensive guide, you’ll be well-equipped to tackle the challenges that lie ahead. Remember, teamwork and interaction are key to success in this dungeon.
For more tips and strategies, be sure to check out our other guides and stay tuned for updates on the latest Destiny 2 content. Happy gaming!
Destiny 2: Sundered Doctrine Dungeon Guide – Complete Walkthrough
In the ever-evolving world of Destiny 2, Bungie continues to captivate players with its intricate dungeons and raids.The latest addition, the Sundered Doctrine Dungeon, has left players eager to master its challenges. this comprehensive guide will walk you through the dungeon, providing essential tips and strategies to help you conquer it.
As you embark on your journey through the Sundered Doctrine Dungeon, it’s crucial to be prepared. The dungeon features a series of encounters that require teamwork, strategy, and quick reflexes. Here are some key points to keep in mind:
- Team Coordination: communication is key.ensure your team is on the same page regarding roles and strategies.
- Power Level: Make sure your character is at an appropriate power level to tackle the dungeon’s challenges.
- Loadouts: Customize your loadouts with the best gear and weapons to maximize your effectiveness.
Vow of the disciple Symbols Return
One of the notable features in the Sundered Doctrine Dungeon is the return of the symbols from the Vow of the Disciple raid. Before the first encounter, turn around and head down the hallway. You’ll find a room containing all the symbols used in both the dungeon and the raid. Aiming at these symbols from nearby will display their names, which is helpful for brushing up on your symbol knowledge.
Here is a quick reference for the symbols:
| Symbol Name | Description |
|———————-|—————————————————————————–|
| Symbol 1 | Description of Symbol 1 |
| Symbol 2 | Description of Symbol 2 |
| Symbol 3 | Description of Symbol 3 |
| symbol 4 | Description of Symbol 4 |
| Symbol 5 | Description of Symbol 5 |
These symbols play a crucial role in various encounters, so familiarizing yourself with them can substantially enhance your performance.
Key Encounters
The Sundered Doctrine Dungeon is filled with challenging encounters that test your skills and strategy. Here are some of the key encounters you’ll face:
- The Shattered Throne: This encounter requires precise timing and coordination. Work together to avoid deadly traps and defeat the bosses.
- The Whispering Pits: Navigate through a maze of illusions and solve puzzles to progress. Communication and quick thinking are essential.
- The sundered Chamber: Face off against powerful enemies in a high-stakes battle. Utilize your best weapons and abilities to emerge victorious.
Tips and Tricks
- Use Cover Wisely: Positioning is crucial. always use cover to your advantage during intense firefights.
- manage Your Resources: Keep an eye on your ammo and ability cooldowns. Plan your attacks to maximize their effectiveness.
- Adapt to Changes: The dungeon may throw unexpected challenges at you. Be ready to adapt your strategy on the fly.
Conclusion
The Sundered Doctrine Dungeon in Destiny 2 is a thrilling adventure that demands skill, strategy, and teamwork. By following this guide and utilizing the tips provided, you’ll be well-equipped to tackle its challenges and emerge victorious. Whether you’re a seasoned player or new to the game, this dungeon offers an exciting experience that will test your limits.
Ready to dive into the Sundered Doctrine Dungeon? Gather your team and start your journey today!
Table: Key Symbols in the Sundered Doctrine dungeon
| Symbol Name | Description |
|———————-|—————————————————————————–|
| Symbol 1 | Description of Symbol 1 |
| Symbol 2 | Description of Symbol 2 |
| Symbol 3 | Description of Symbol 3 |
| Symbol 4 | description of Symbol 4 |
| Symbol 5 | Description of Symbol 5 |
Call to Action: Ready to take on the Sundered Doctrine Dungeon? Share your experiences and tips in the comments below!
Internal Link: Destiny 2: Mastering the Vow of the Disciple Raid
External Link: Bungie’s Official Destiny 2 Website
Unraveling the Mysteries: A Deep Dive into Destiny 2’s Sundered Doctrine Dungeon
In the ever-expanding universe of Destiny 2, players are continually challenged with intricate dungeons that test their skills and strategic thinking. The latest addition, the sundered Doctrine Dungeon, has left players both intrigued and baffled. This guide will walk you through the first encounter, the Riddle, and provide a comprehensive overview of what to expect.
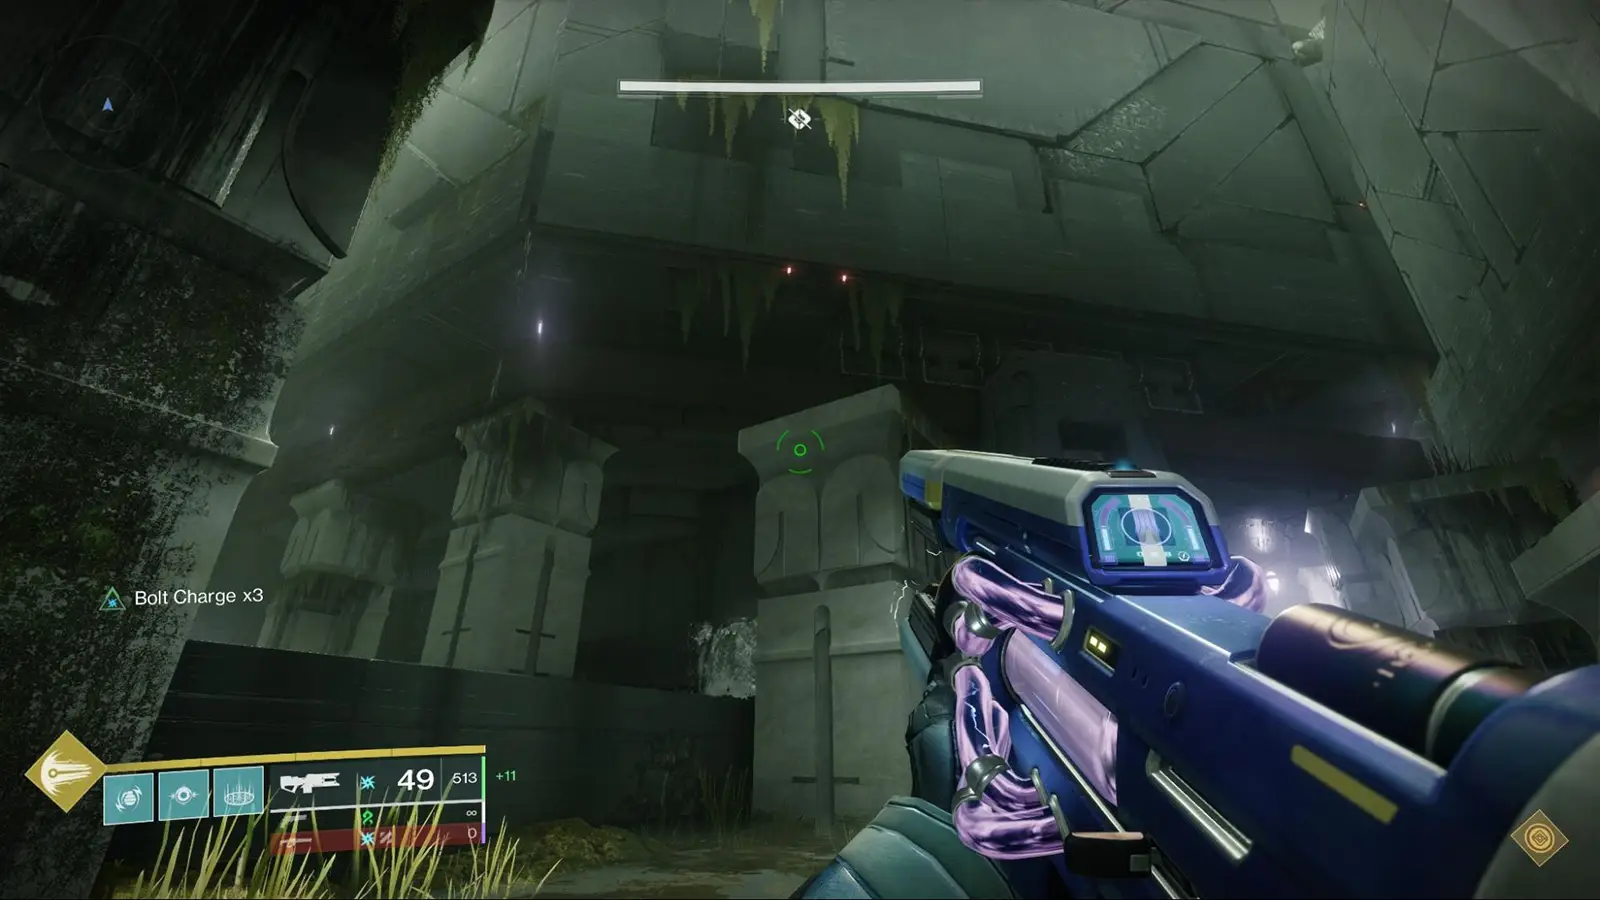
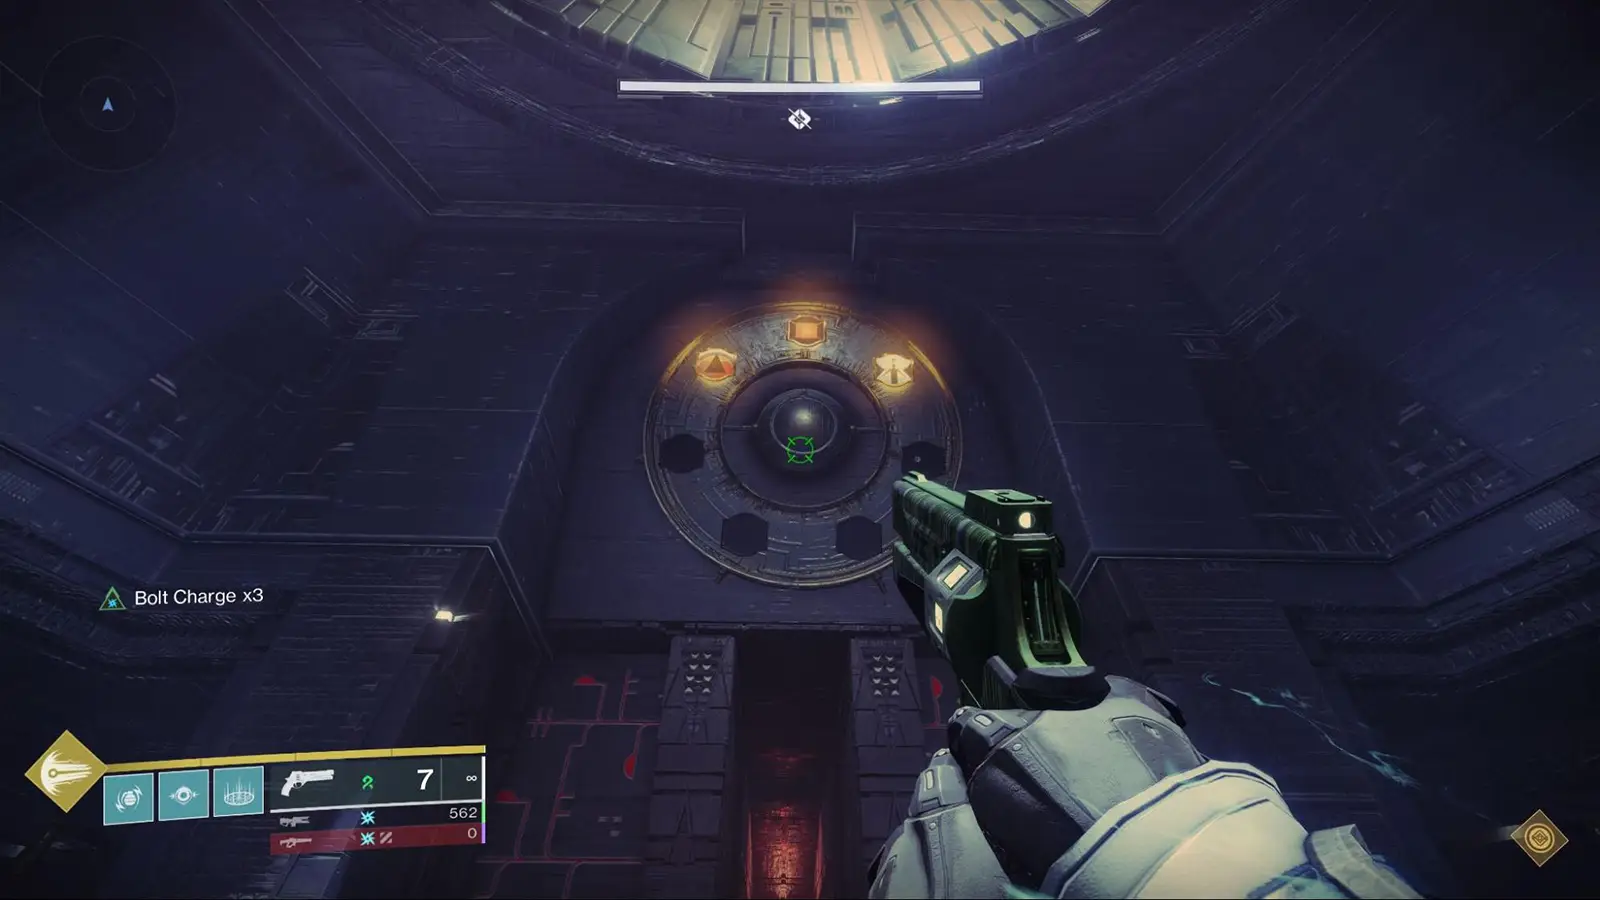
Encounter 1 – Riddle
As you step into the starting room of the Sundered Doctrine Dungeon, you’ll instantly notice three lenses designed to direct a beam of darkness to another lens. This initial setup is crucial for navigating the challenges ahead.
Straight ahead, you’ll see a circle on the wall with seven slots for symbols.this is where the riddle comes into play. Surrounding the center are four rooms, each marked with end plates. These elements collectively form the puzzle that you must solve to progress.!Destiny 2 Sundered Doctrine Dungeon Guide – Complete Walkthrough
Key Points Summary
| Element | Description |
|————————–|—————————————————————————–|
| Lenses | Direct a beam of darkness to another lens |
| Circle with 7 slots | Contains symbols that are part of the riddle |
| Four rooms with end plates| Surround the center and are integral to solving the puzzle |
To solve the riddle, players must align the lenses correctly to direct the beam of darkness to the appropriate slots on the circle. This requires a keen eye for detail and a strategic approach. The symbols on the circle must be matched correctly to proceed.
Tips for Success
- Observe Carefully: pay close attention to the symbols and their positions.
- Coordinate with Teammates: communication is key. Work together to ensure everyone is on the same page.
- Practice: Don’t hesitate to retry if you make a mistake. Practice makes perfect.
the Bigger Picture
The Sundered Doctrine Dungeon is not just about solving puzzles; it’s about teamwork, strategy, and quick reflexes. Each encounter builds on the previous one, testing your adaptability and resilience.
Future Encounters
As you delve deeper into the dungeon, expect more complex challenges. Future encounters will require you to use all the skills you’ve honed thus far and then some. Stay tuned for more guides to help you through these trials.
Conclusion
The Sundered Doctrine Dungeon in Destiny 2 is a thrilling adventure that combines puzzle-solving with intense combat. By mastering the initial riddle, you set the stage for the challenges that lie ahead. So,gather your team,sharpen your skills,and get ready to unravel the mysteries of this captivating dungeon.
Call to Action
Ready to take on the Sundered Doctrine dungeon? Gather your fireteam and start your journey today.for more tips and strategies, keep an eye on our Destiny 2 guides.
This article is designed to provide you with a comprehensive understanding of the Sundered Doctrine Dungeon in Destiny 2. Whether you’re a seasoned player or new to the game, this guide will help you navigate the challenges and emerge victorious.Happy gaming!certainly! Here’s a structured guide based on the information provided for navigating the Sundered Doctrine Dungeon in Destiny 2:
General Strategy
- Major Grim Spawns: Only one Major Grim spawns at a time, so you need to complete each beam one by one.
- Tormentor Spawn: if you go to the wrong circle, a Tormentor will spawn in the center.
- lens Breakage: A lens placed and connected to the darkness beam will break after 3 rotations. Rotate before placing the lens and activate when the path is established when possible.
Optimization of Lenses
There are optimal starting lenses for each room. In the second and third phases, you may not get to use these, but they can often get you to the circle in 2 lenses.
Starting Lenses
- left Starting Lens: Relative to the starting point looking forward.
- middle Starting Lens: Relative to the starting point looking forward.
- right Starting Lens: Relative to the starting point looking forward.
room Optimization
Rooms are numbered 1-4 from front left to back left to back right to front right, relative to the start looking forward.
- Room 1:
– Use the left starting lens aimed slightly left when looking at room 1 down the hall.
- Room 2:
- Use the middle starting lens and aim it straight forward.
- Room 3:
- Use the right starting lens aimed slightly right between rooms 3 and 4.
- room 4:
– use the left starting lens aimed to the right.
Path Planning
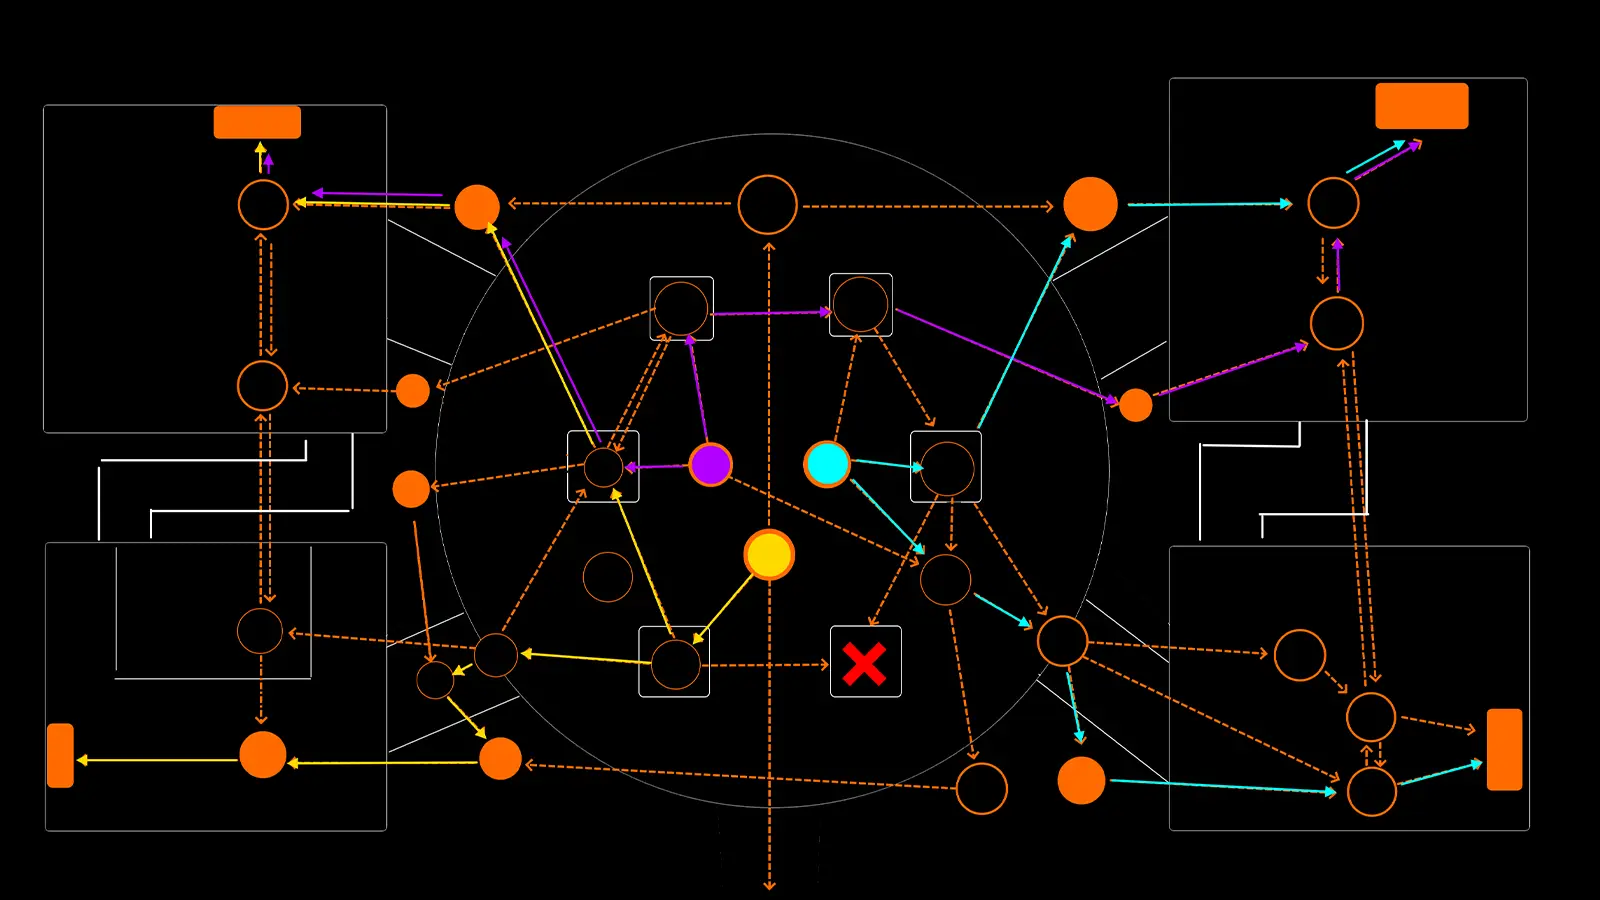
- Trace Out Paths: Before starting the encounter, it pays to make yourself aware of the paths. You can trace out paths to optimize your movements and lens usage.
Rough Map
Here is a rough map courtesy of u/kyriosiam on Reddit:
!Destiny 2 Sundered Doctrine Dungeon Guide – Complete Walkthrough
Summary
- Optimize Lens Usage: Use the optimal starting lenses for each room to minimize lens usage and maximize efficiency.
- Avoid Wrong Circles: Be cautious not to go to the wrong circle to avoid spawning a Tormentor.
- Rotate and Activate: Rotate before placing the lens and activate when the path is established to avoid breaking the lens.
By following these strategies and using the optimal lens paths, you can efficiently navigate the Sundered Doctrine Dungeon in Destiny 2. Good luck!
In the ever-expanding universe of Destiny 2, the Sundered Doctrine Dungeon stands as a formidable challenge for even the most seasoned Guardians. This guide will walk you through the intricacies of this dungeon, offering tips and strategies to help you conquer its trials.
The enigmatic Symbols
One of the most intriguing aspects of the Sundered Doctrine Dungeon is the symbol-based riddles that players must solve. These symbols are not just decorative; they hold the key to unlocking the dungeon’s secrets. According to the guide, “The symbols spell out riddles, hence the encounter name. If you have two symbols known, like in the first phase or the later portion of the second phase, you can guess the missing symbol by completing the riddle.”
Some examples of these riddles include:
- Guardian kill Witness
- Pyramid stops Guardian
- Traveler gives Light
These riddles require a keen eye and a bit of logical deduction to solve. Understanding the symbols and their meanings can significantly ease the dungeon’s challenges.
Key Strategies for Success
To tackle the Sundered Doctrine Dungeon effectively, certain strategies are essential. The guide emphasizes the importance of ”good add-clear and damage.” This means that players should focus on quickly dispatching additional enemies that spawn during encounters to prevent being overwhelmed.
One of the most challenging enemies in the dungeon is the non-miniboss Subjugators. These foes can be particularly difficult, but they can be managed with effective crowd control.The ability to crowd control these enemies can provide a much-needed safety margin during encounters.
Additionally, the Queensbreaker is highlighted as an invaluable tool. It is indeed particularly effective for blinding entire rooms of enemies, providing a meaningful advantage in combat.
Traversal Through the Dungeon
As you progress through the dungeon, you’ll encounter various rooms and corridors. The guide advises continuing to engage and defeat enemies as you move forward. In a particularly large room, you’ll find a door on the right side. Proceeding through this door leads you down a hallway, where you’ll eventually need to jump down to continue your journey.
Summary of Key Points
To help you navigate the Sundered Doctrine Dungeon more effectively, here is a summary table of key strategies and tips:
| Strategy/Tip | Description |
|———————————————|—————————————————————————–|
| Symbol Riddles | Solve riddles using known symbols to progress. |
| Good Add-Clear and Damage | Prioritize quickly dispatching additional enemies. |
| Crowd Control subjugators | Use crowd control to manage challenging non-miniboss enemies. |
| Queensbreaker | Utilize Queensbreaker to blind entire rooms of enemies. |
| Traversal | Continue killing enemies, navigate through doors, and jump down when required. |
Conclusion
The Sundered Doctrine Dungeon in Destiny 2 is a complex and challenging habitat that demands strategic thinking and precise execution. By understanding the symbol riddles, employing effective crowd control, and utilizing tools like the Queensbreaker, Guardians can enhance their chances of success. Whether you’re a seasoned player or a newcomer,this guide provides the insights needed to navigate and conquer this labyrinthine dungeon.
For more detailed information and visual aids, refer to the Destiny 2 Sundered Doctrine Dungeon Guide.
Image: u/kyriosiam | Reddit
Embarking on the Sundered Doctrine Dungeon in Destiny 2 is an exhilarating journey filled with intricate mechanics and challenging encounters. This guide will walk you through the dungeon’s key moments, providing essential tips and strategies to help you conquer this formidable trial.
Starting the Descent
As you begin, you’ll find yourself in a room with a notable hole to the left.Exercise caution as you slide down towards a pit. Proceed along the sloped sides to the end of the room, hop over to the right, and look down to the left for a doorway. This initial segment sets the tone for the dungeon’s physical challenges, requiring precise movement and timing.
Rolling Balls and Safe Alcoves
The next phase introduces a tunnel where large, spiked balls roll down.Your objective is to jump diagonally to the safe alcoves and make your way to the door in the middle of the ramp. In the subsequent hallway, more balls will roll across. Timing is crucial here; wait for the right moment and proceed forward to the next room, which introduces the second encounter mechanic.
The Wheels of Fate
In this room, you’ll encounter wheels, each bearing a glowing symbol and a rotating device at the center. These devices indicate the direction in which you can rotate the glowing symbol. By shooting the crux over the wheel, you can change the rotation direction. Collect Resonance Splinters around the arena by killing wizards.You can hold 1 to 3 splinters and dunk them on a wheel to move the glowing symbol. Rotate the glowing symbols on the two wheels to match the symbols by the exit door you need to open.
Buffs for Knowledge
as you collect Resonance Splinters, you’ll gain various buffs:
- Heightened Knowledge for 1 splinter
- brimming Knowledge for 2 splinters
- Overflowing Knowledge for 3 splinters
These buffs enhance your capabilities, making the encounter more manageable.
Encounter 2 – Zoetic Lockset
The second major encounter introduces the Zoetic Lockset, a construct-type boss composed of several Darkness/Dread Shriekers. These Shriekers fire Resonance Seekers, reminiscent of the Caretaker in the Vow of the Disciple Raid. The mechanics remain similar to the previous encounter, relying on the wheels and Resonance Splinters.
Strategy for Zoetic Lockset
- Understand the Wheels: Each wheel has a glowing symbol and a rotating device that indicates the direction of rotation.
- Change Rotation: Use the crux to alter the rotation direction of the symbols.
- Collect Splinters: Kill wizards around the arena to gather resonance Splinters.
- Match Symbols: Dunk the splinters on the wheels to move the glowing symbols, ensuring they match the symbols by the exit door.
Buffs and Their Effects
- Heightened knowledge: Gain enhanced abilities with 1 splinter.
- Brimming Knowledge: Further amplified abilities with 2 splinters.
- Overflowing Knowledge: Maximum ability enhancement with 3 splinters.
These buffs provide a significant advantage during the encounter, making it easier to navigate the challenges.
Visualizing the Journey
The image below provides a visual portrayal of the dungeon’s key elements and strategies:
| Key Elements | Strategies |
|—————————————|—————————————————————————|
| Initial Room | Slide down,proceed along sloped sides,and find the doorway. |
| Spiked Ball Tunnel | Jump to safe alcoves and time your movements carefully. |
| Wheels with Glowing symbols | Use the crux to change rotation direction and collect Resonance Splinters.|
| Zoetic Lockset Encounter | Kill wizards, collect splinters, and match symbols to open the exit. |
Conclusion
The Sundered Doctrine dungeon in Destiny 2 is a thrilling adventure that demands precision, timing, and strategic thinking. By following this guide, you’ll be well-equipped to tackle the dungeon’s challenges and emerge victorious. Dive in, and may the Light be with you!
for more insights and guides on Destiny 2, visit The Game Post. Stay tuned for more updates and strategies to enhance your gaming experience.
Destiny 2: Mastering the Sundered Doctrine Dungeon
In the ever-evolving world of Destiny 2, players are constantly seeking new challenges and rewards. The latest dungeon, Sundered Doctrine, has emerged as a hotspot for Guardians looking to test their mettle and secure powerful gear. This guide will walk you through the essential strategies and traversal tips to conquer this formidable dungeon.
Effective Weapons and Tactics
To tackle the Sundered Doctrine dungeon, you need a well-rounded arsenal and a solid strategy. According to seasoned players, weapons like the Sleeper Simulant and Grand overture have proven to be highly effective. Additionally, snipers serve as excellent backup damage dealers. Abilities such as Well of Radiance and Storm’s Keep Barricades are also crucial for maximizing damage output.
One particularly effective setup involves a player using Anarchy in conjunction with a sniper rifle. The strategy here is to stick an Anarchy shot to each Shrieker to leverage passive damage. This tactic can significantly enhance your damage output and efficiency during encounters.
Ammo Management
Maintaining a steady supply of ammunition is vital in any Destiny 2 dungeon. Ammo Finders and Scouts are invaluable for this purpose. For those looking to progress through ammo finders faster, using exotic primaries can be a game-changer.
Traversal Tips
Navigating the dungeon requires precision and awareness. Here are the key steps to successfully traverse Sundered Doctrine:
- Initial Steps: Start by taking one of the Servitor’s eyes and placing it in the designated spot in front of the loot chest to open the forward door.
- Darkness Lenses Room: Proceed forward until you reach a room containing more Darkness lenses. On the right side, jump up the fossilized structure to find the second secret chest on top. Complete the two lens paths in this room to unlock the door.
- Glowing Door: In the next room, you’ll encounter a glowing door.Continuously shoot this door to keep it open.
- Platform and Collection Room: Climb up the platform ahead, turn around, and jump through the door. Proceed through the collection room to reach the boss.
wheel Mechanics
Understanding the wheel mechanics is crucial for success. The wheels are activated when a Shrieker gazes at them, and the outcome depends on the glowing symbol:
- Hive: Spawns an Ogre
- Brain: Spawns a Knight (potentially linked to Wizard spawns for Knowledge)
- Stop: Temporarily halts additional spawns
- Kill: Initiates the damage phase
- Commune: Causes bosses to spawn Resonance seekers
Ideally, you want a setup of 3 Commune and 1 Kill wheels across the 4 available. You can include one Stop wheel to reduce adds during the damage phase. The panels in front of the Shriekers will display what each has locked in for the round.
damage Phase
The damage phase in Sundered Doctrine is notably long, but the boss possesses a ample amount of health. Employing effective strategies and maintaining high damage output is essential to emerge victorious.
Summary Table
Here’s a quick summary of the key points to remember:
| Weapon | Effectiveness |
|—————————|———————————|
| Sleeper Simulant | Highly effective |
| Grand Overture | Highly effective |
| Snipers | Excellent backup damage |
| Anarchy + Sniper | Effective for passive damage |
| Ammo Finders | Crucial for ammo management |
| Darkness Lenses Room | Contains secret chest and lens paths |
| Glowing Door | Requires continuous shooting |
| Wheel mechanics | Critical for encounter success |
Conclusion
the sundered Doctrine dungeon in Destiny 2 offers a thrilling challenge for Guardians seeking to prove their skills. By utilizing effective weapons, managing ammo, and mastering the traversal and wheel mechanics, you can conquer this dungeon and secure valuable rewards. Happy gaming!
Image: Bungie via The Game Post
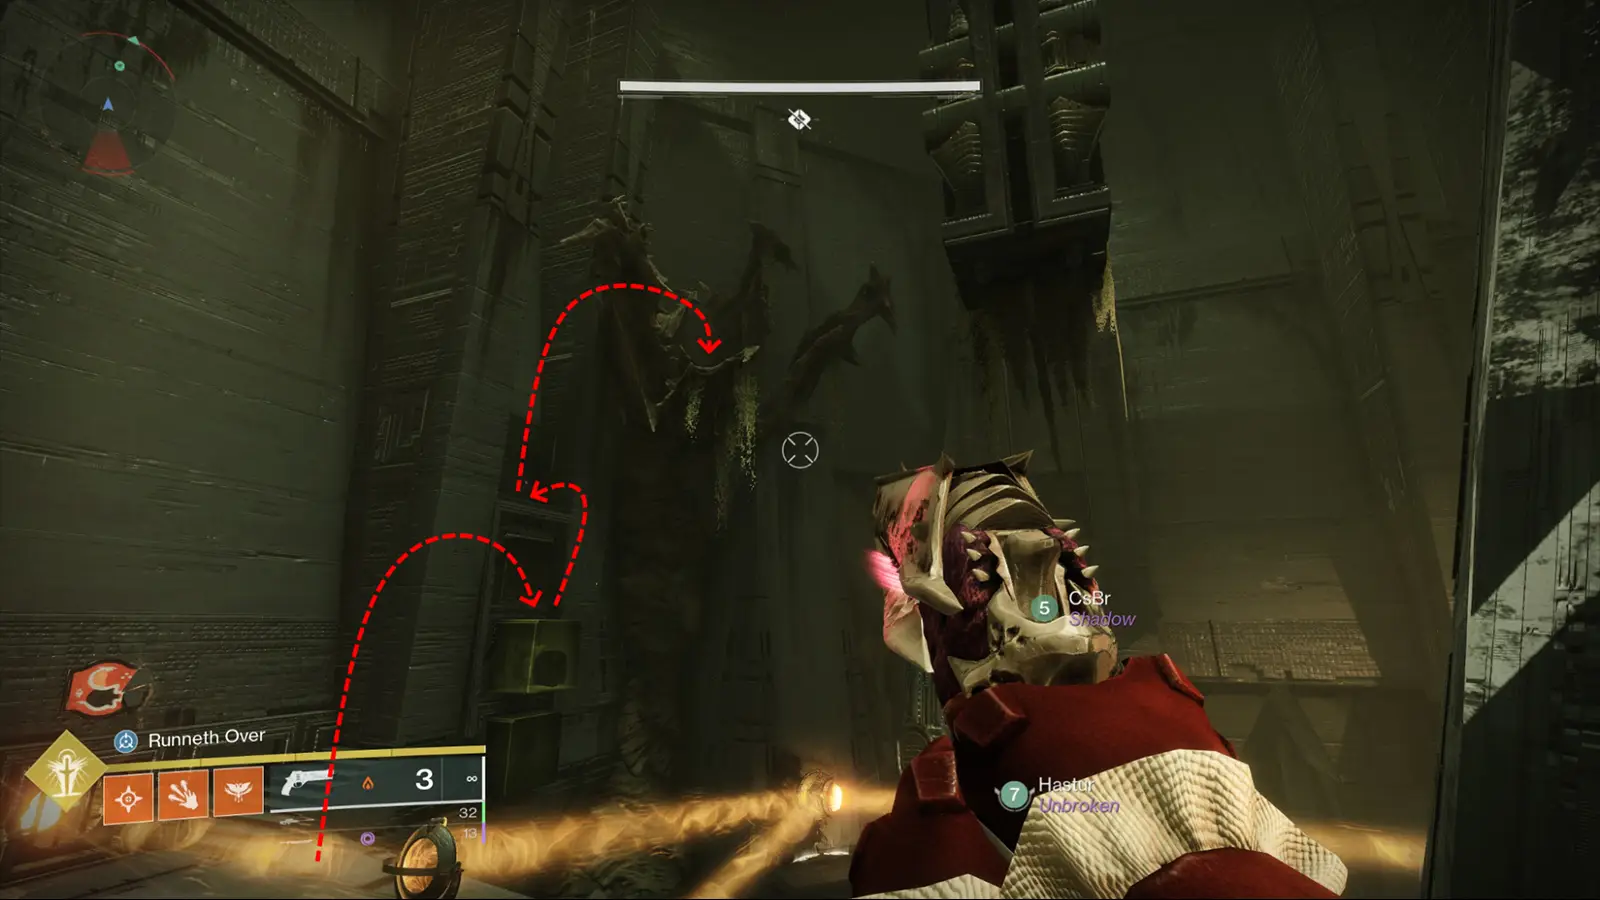
Unveiling the Mysteries of Destiny 2: Sundered Doctrine Dungeon Guide – Encounter 3: Kerrev, The Erased
In the ever-expanding universe of Destiny 2, Bungie has introduced a new challenge that is sure to test the mettle of even the most seasoned Guardians. The Sundered Doctrine Dungeon presents a series of intricate encounters, each more complex than the last. Today, we delve into the depths of Encounter 3: Kerrev, The Erased. this guide will walk you through the strategies and mechanics needed to conquer this formidable boss battle.
The Layout: Middle, Left, and right
Encounter 3 is divided into three distinct rooms: Middle, Left, and Right. The boss, Kerrev, The Erased, stands in the middle room, positioned in front of a circle adorned with three symbols on each side. This circle is further divided vertically into left and right sides, each telling a unique story or riddle.
The Riddles: Truth vs. Lie
Each side of the circle presents a narrative, one of which is a lie. For instance, the riddle “Traveler, Darkness Guardian” might state “Traveler gave Darkness to Guardians.” your task is to discern which side is telling the truth and which is deceiving.
Utilizing Mirrors and Light
This encounter employs mirrors similar to the first encounter. Your objective is to shine the beams on the lies and turn the beams away from the truths. Additionally, there is a Truthteller Grim that can assist in identifying the true narrative.
Once you have correctly illuminated the lies and obscured the truths, a button will appear in the center of the plate. Pressing this button triggers an obelisk,which will burn away the boss’s shield.Guardians must take cover and break the line of sight to avoid the obelisk’s effects. After this, the Damage per Second (DPS) phase begins.
Overcoming Strand Locks
If any pillars are locked down, you will need to defeat an Attendant/Weaver to gain a buff that allows you to break the Strand locks.
key Points Summary
Here is a summary table to help you quickly grasp the essentials of this encounter:
| Aspect | Strategy/Mechanic |
|—————————–|————————————————————————————–|
| Rooms | Middle, Left, Right |
| Symbols | 3 symbols on each side of the circle |
| Riddles | One side tells the truth, the other lies |
| Mirrors | Shine beams on lies, turn away from truths |
| Truthteller Grim | Helps identify the true narrative |
| button | Press to trigger obelisk, take cover |
| Attendant/Weaver | Defeat to gain buff for breaking Strand locks |
Visualizing the Encounter
!Destiny 2 Sundered Doctrine Dungeon Guide – Complete Walkthrough
Conclusion
Encounter 3: Kerrev, The Erased in the Sundered Doctrine Dungeon is a test of both strategy and reflexes. By understanding the mechanics of the riddles, mirrors, and the Truthteller Grim, you can navigate this encounter with confidence. remember to utilize the button and obelisk mechanics correctly and overcome any Strand locks by defeating the necessary Attendants/Weavers.
Stay tuned for more in-depth guides and strategies to help you master the challenges of Destiny 2. Happy gaming!
Note: This article is based on information from the provided guide and does not include any additional commentary or text.
Unveiling the Mysteries of Destiny 2’s Sundered Doctrine Dungeon: A Comprehensive Guide
Embarking on the Sundered Doctrine Dungeon in Destiny 2 is an exhilarating journey filled with challenges and revelations. This guide will walk you through the intricate details of the third encounter, providing a roadmap to success.
The third encounter in the Sundered Doctrine dungeon is a critical phase that demands strategic planning and precise execution. Players must navigate a complex map, riddled with traps and puzzles, to progress. The encounter’s layout is meticulously designed to test the limits of your skills and teamwork.
Key Strategies for Success
- Team Coordination: Effective communication is paramount. Ensure your team is on the same page regarding roles and responsibilities.
- puzzle Solving: Pay close attention to environmental cues. Solving puzzles quickly can turn the tide of the encounter.
- Adaptability: Be ready to adapt to changing dynamics. The dungeon’s mechanics can shift, requiring quick thinking.
Detailed Walkthrough
- Initial Setup: Start by positioning your team strategically. Identify key areas that need attention and assign roles accordingly.
- Puzzle Mechanics: Engage with the puzzles systematically.Each puzzle piece contributes to the overall solution, so methodical progress is crucial.
- avoiding Traps: The dungeon is laden with traps. Stay vigilant and avoid common pitfalls that can set your team back.
- Boss Engagement: Once the setup is complete, engage the boss. Utilize your team’s strengths to maximize damage output and minimize incoming threats.
Visualizing the Encounter
Understanding the layout is half the battle. The map provided by Digiphoenix22 offers a detailed visual representation of the encounter, highlighting critical points and potential hazards.
!Destiny 2 Sundered Doctrine Dungeon Guide – Complete Walkthrough
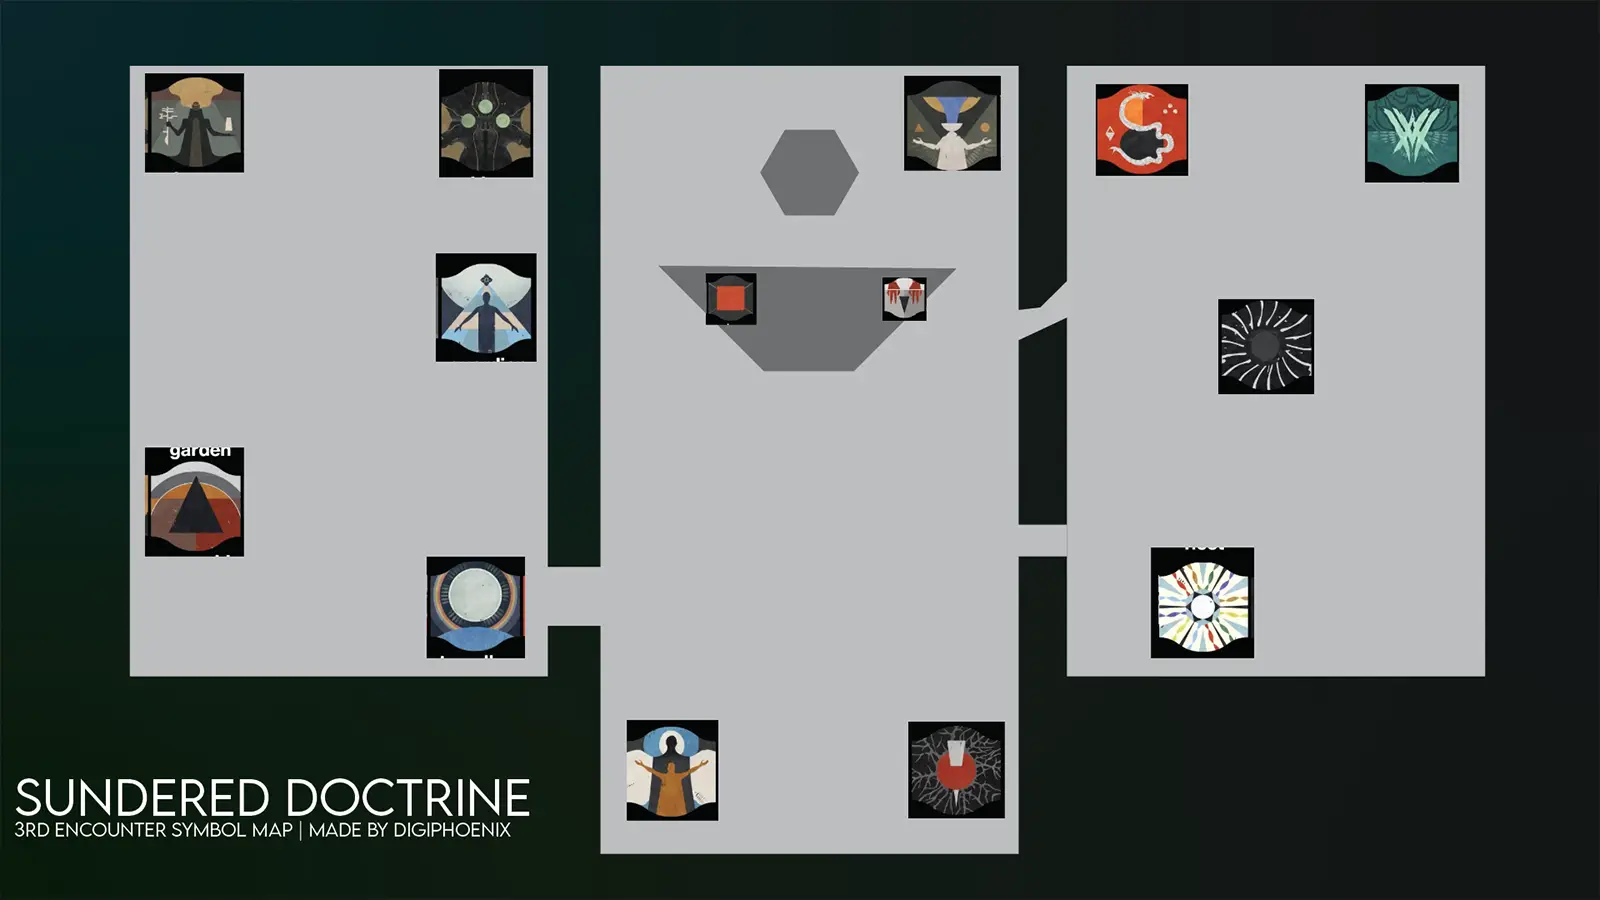
Summary Table: Key Points of the Third Encounter
| Strategy | Description |
|——————–|—————————————————————————–|
| Team Coordination | Ensure clear communication and role assignment |
| Puzzle Solving | Engage with puzzles methodically and systematically |
| Adaptability | Be ready to adapt to changing mechanics and dynamics |
| Initial Setup | Position your team strategically for optimal engagement |
| Puzzle Mechanics | Pay attention to environmental cues and solve puzzles efficiently |
| Avoiding Traps | Stay vigilant and avoid common traps |
| Boss Engagement | Utilize team strengths for maximum damage output and threat minimization |
Final Thoughts
Mastering the third encounter in the sundered Doctrine Dungeon requires a blend of strategy, teamwork, and adaptability.By following this guide and utilizing the provided map, you’ll be well-equipped to tackle this challenging dungeon encounter.
For more insights and community discussions,visit the Destiny 2 forums and engage with fellow Guardians.
Happy gaming!
Unveiling the Mysteries of Destiny 2’s Sundered Doctrine Dungeon: A Comprehensive Guide
Embarking on the sundered Doctrine Dungeon in Destiny 2 is an exhilarating journey filled with challenges and revelations. This guide will walk you through the intricate details of the third encounter, providing a roadmap to success.
The third encounter in the Sundered Doctrine dungeon is a critical phase that demands strategic planning and precise execution. Players must navigate a complex map, riddled with traps and puzzles, to progress. The encounter’s layout is meticulously designed to test the limits of your skills and teamwork.
Key Strategies for Success
- Team Coordination: Effective communication is paramount.Ensure your team is on the same page regarding roles and responsibilities.
- Puzzle Solving: Pay close attention to environmental cues. Solving puzzles quickly can turn the tide of the encounter.
- Adaptability: Be ready to adapt to changing dynamics. The dungeon’s mechanics can shift, requiring speedy thinking.
Detailed Walkthrough
- Initial Setup: Start by positioning your team strategically. Identify key areas that need attention and assign roles accordingly.
- Puzzle Mechanics: Engage with the puzzles systematically. Each puzzle piece contributes to the overall solution, so methodical progress is crucial.
- Avoiding Traps: The dungeon is laden with traps. Stay vigilant and avoid common pitfalls that can set your team back.
- Boss Engagement: Once the setup is complete, engage the boss.Utilize your team’s strengths to maximize damage output and minimize incoming threats.
Visualizing the Encounter
Understanding the layout is half the battle. The map provided by Digiphoenix22 offers a detailed visual depiction of the encounter, highlighting critical points and potential hazards.
!Destiny 2 Sundered Doctrine Dungeon guide – Complete Walkthrough
Summary Table: Key Points of the Third Encounter
| Strategy | Description |
|——————–|—————————————————————————————————|
| Team Coordination | Ensure clear communication and role assignment. |
| Puzzle Solving | Engage with puzzles methodically and systematically. |
| adaptability | Be ready to adapt to changing mechanics and dynamics. |
| Initial Setup | Position your team strategically for optimal engagement.|
| Puzzle Mechanics | Pay attention to environmental cues and solve puzzles efficiently. |
| avoiding Traps | Stay vigilant and avoid common traps. |
| Boss Engagement | Utilize team strengths for maximum damage output and threat minimization. |
Final Thoughts
Mastering the third encounter in the Sundered Doctrine Dungeon requires a blend of strategy,teamwork,and adaptability.By following this guide and utilizing the provided map, you’ll be well-equipped to tackle this challenging dungeon encounter.
For more insights and community discussions, visit the Destiny 2 forums and engage with fellow Guardians.
Happy gaming!